Update Store Configuration
Grubdeli Merchant App Video

Benjamin Mathew
Last Update há 4 meses
Learn how to update Business Hours & Availability, order options, tax GST, and extra packaging
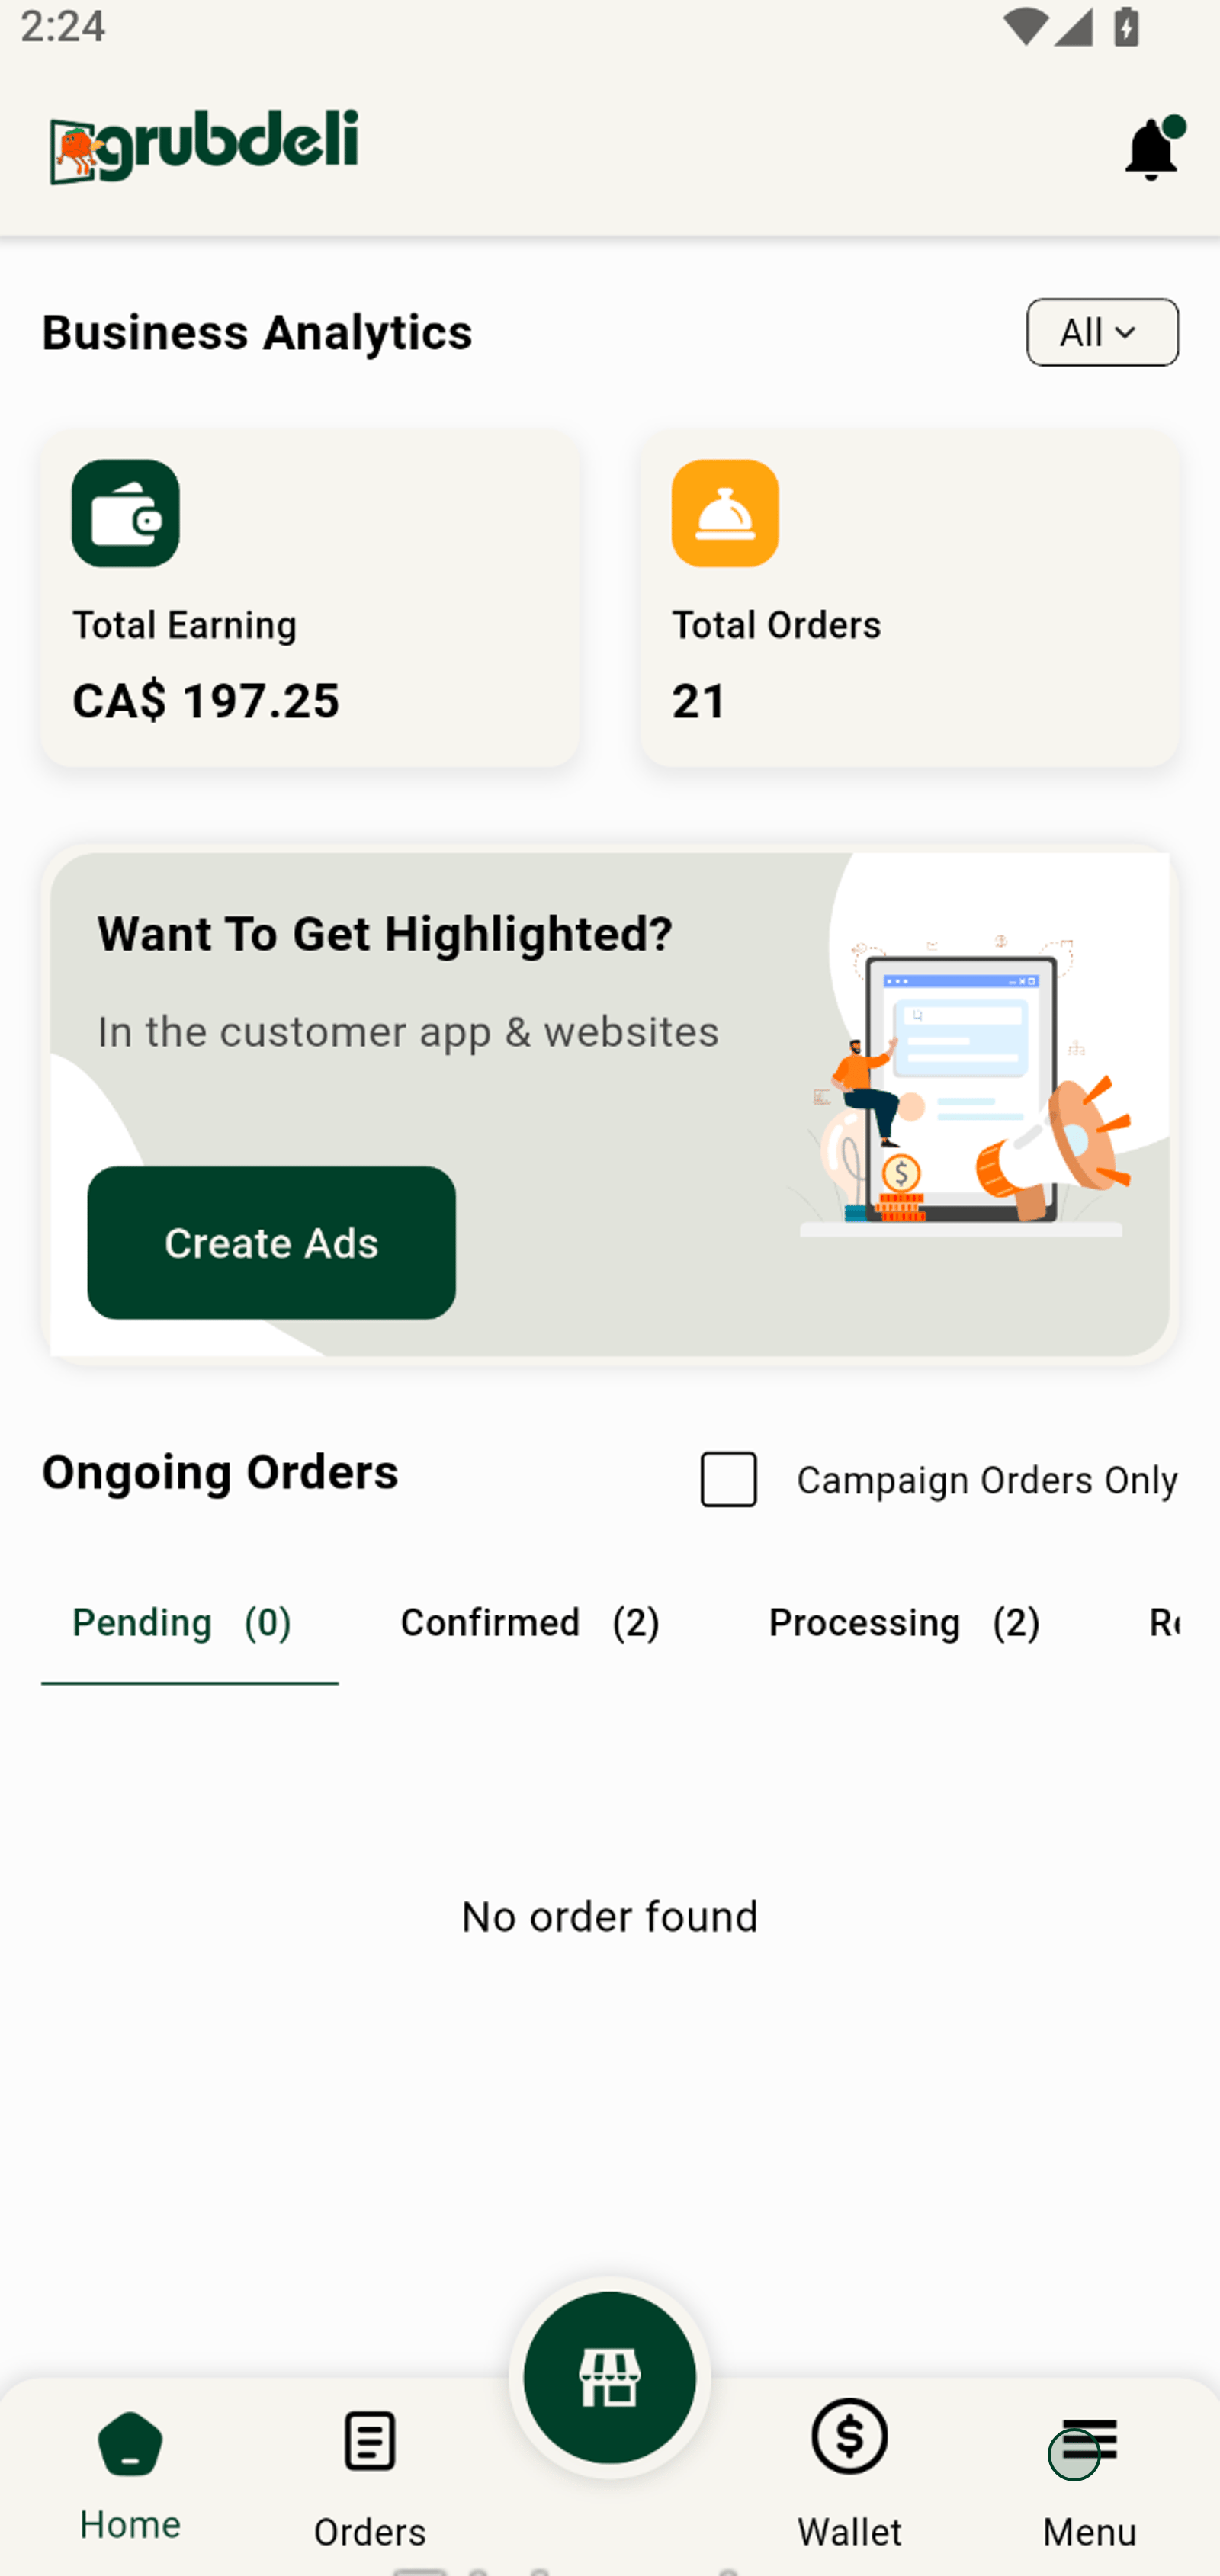
1. Start by launching the admin dashboard.
Tap the Menu icon to browse more management settings.
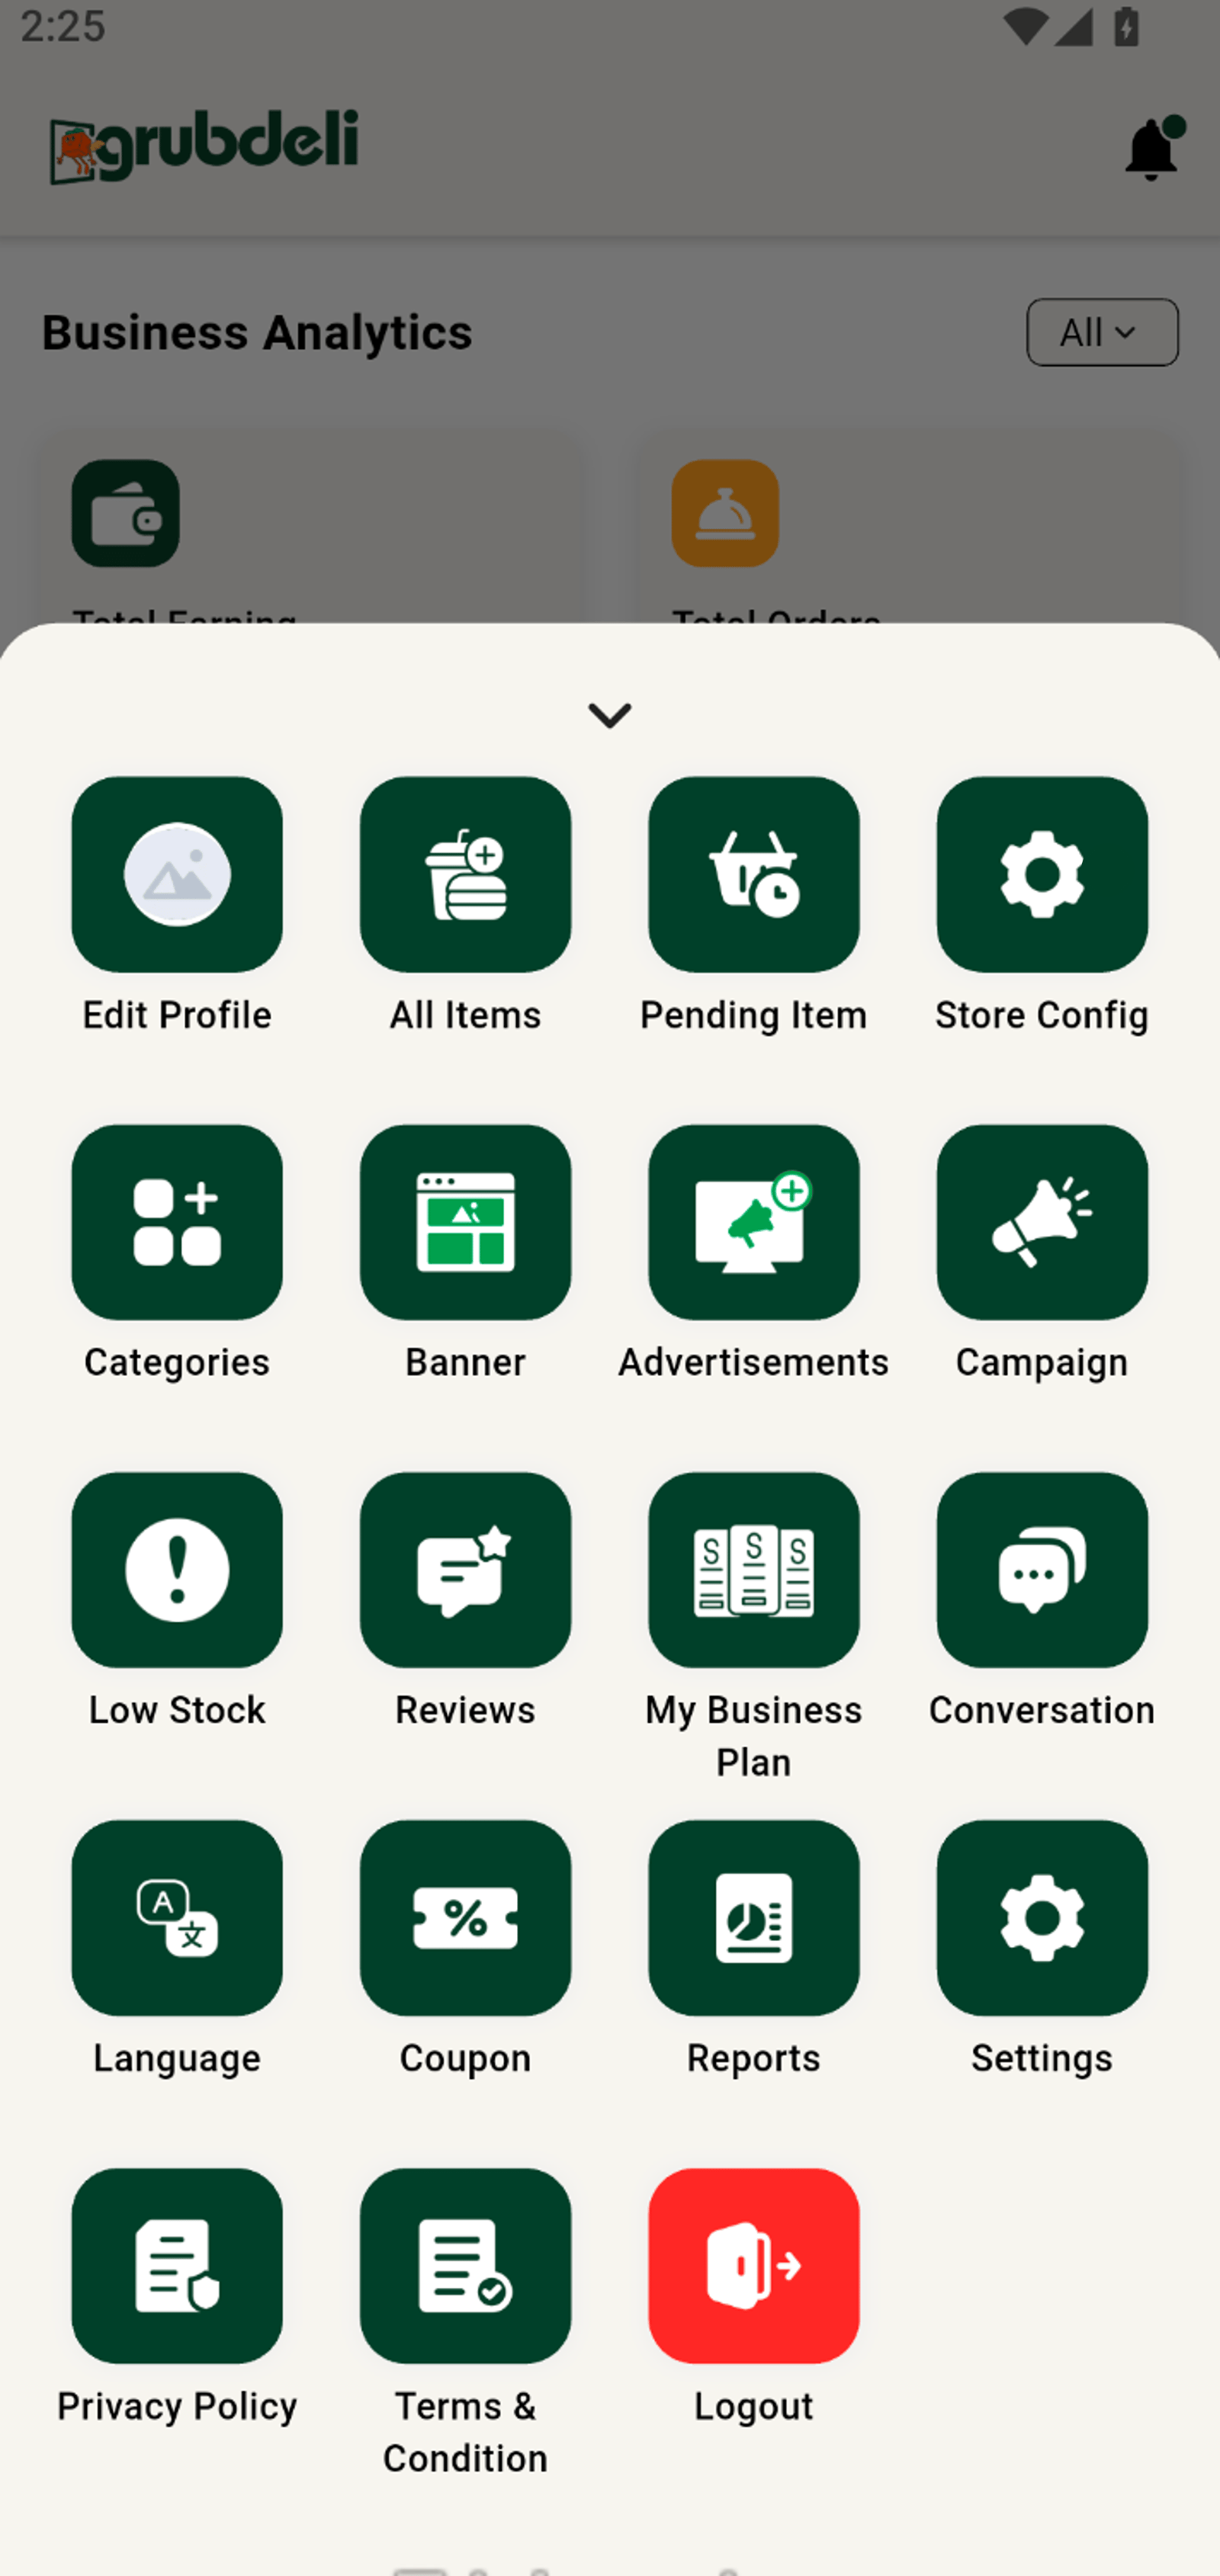
2. Go to 'Store Settings' to manage your store configuration.
Choose Store Config to access all your store's main settings.
3. Select the store you wish to edit from the list.
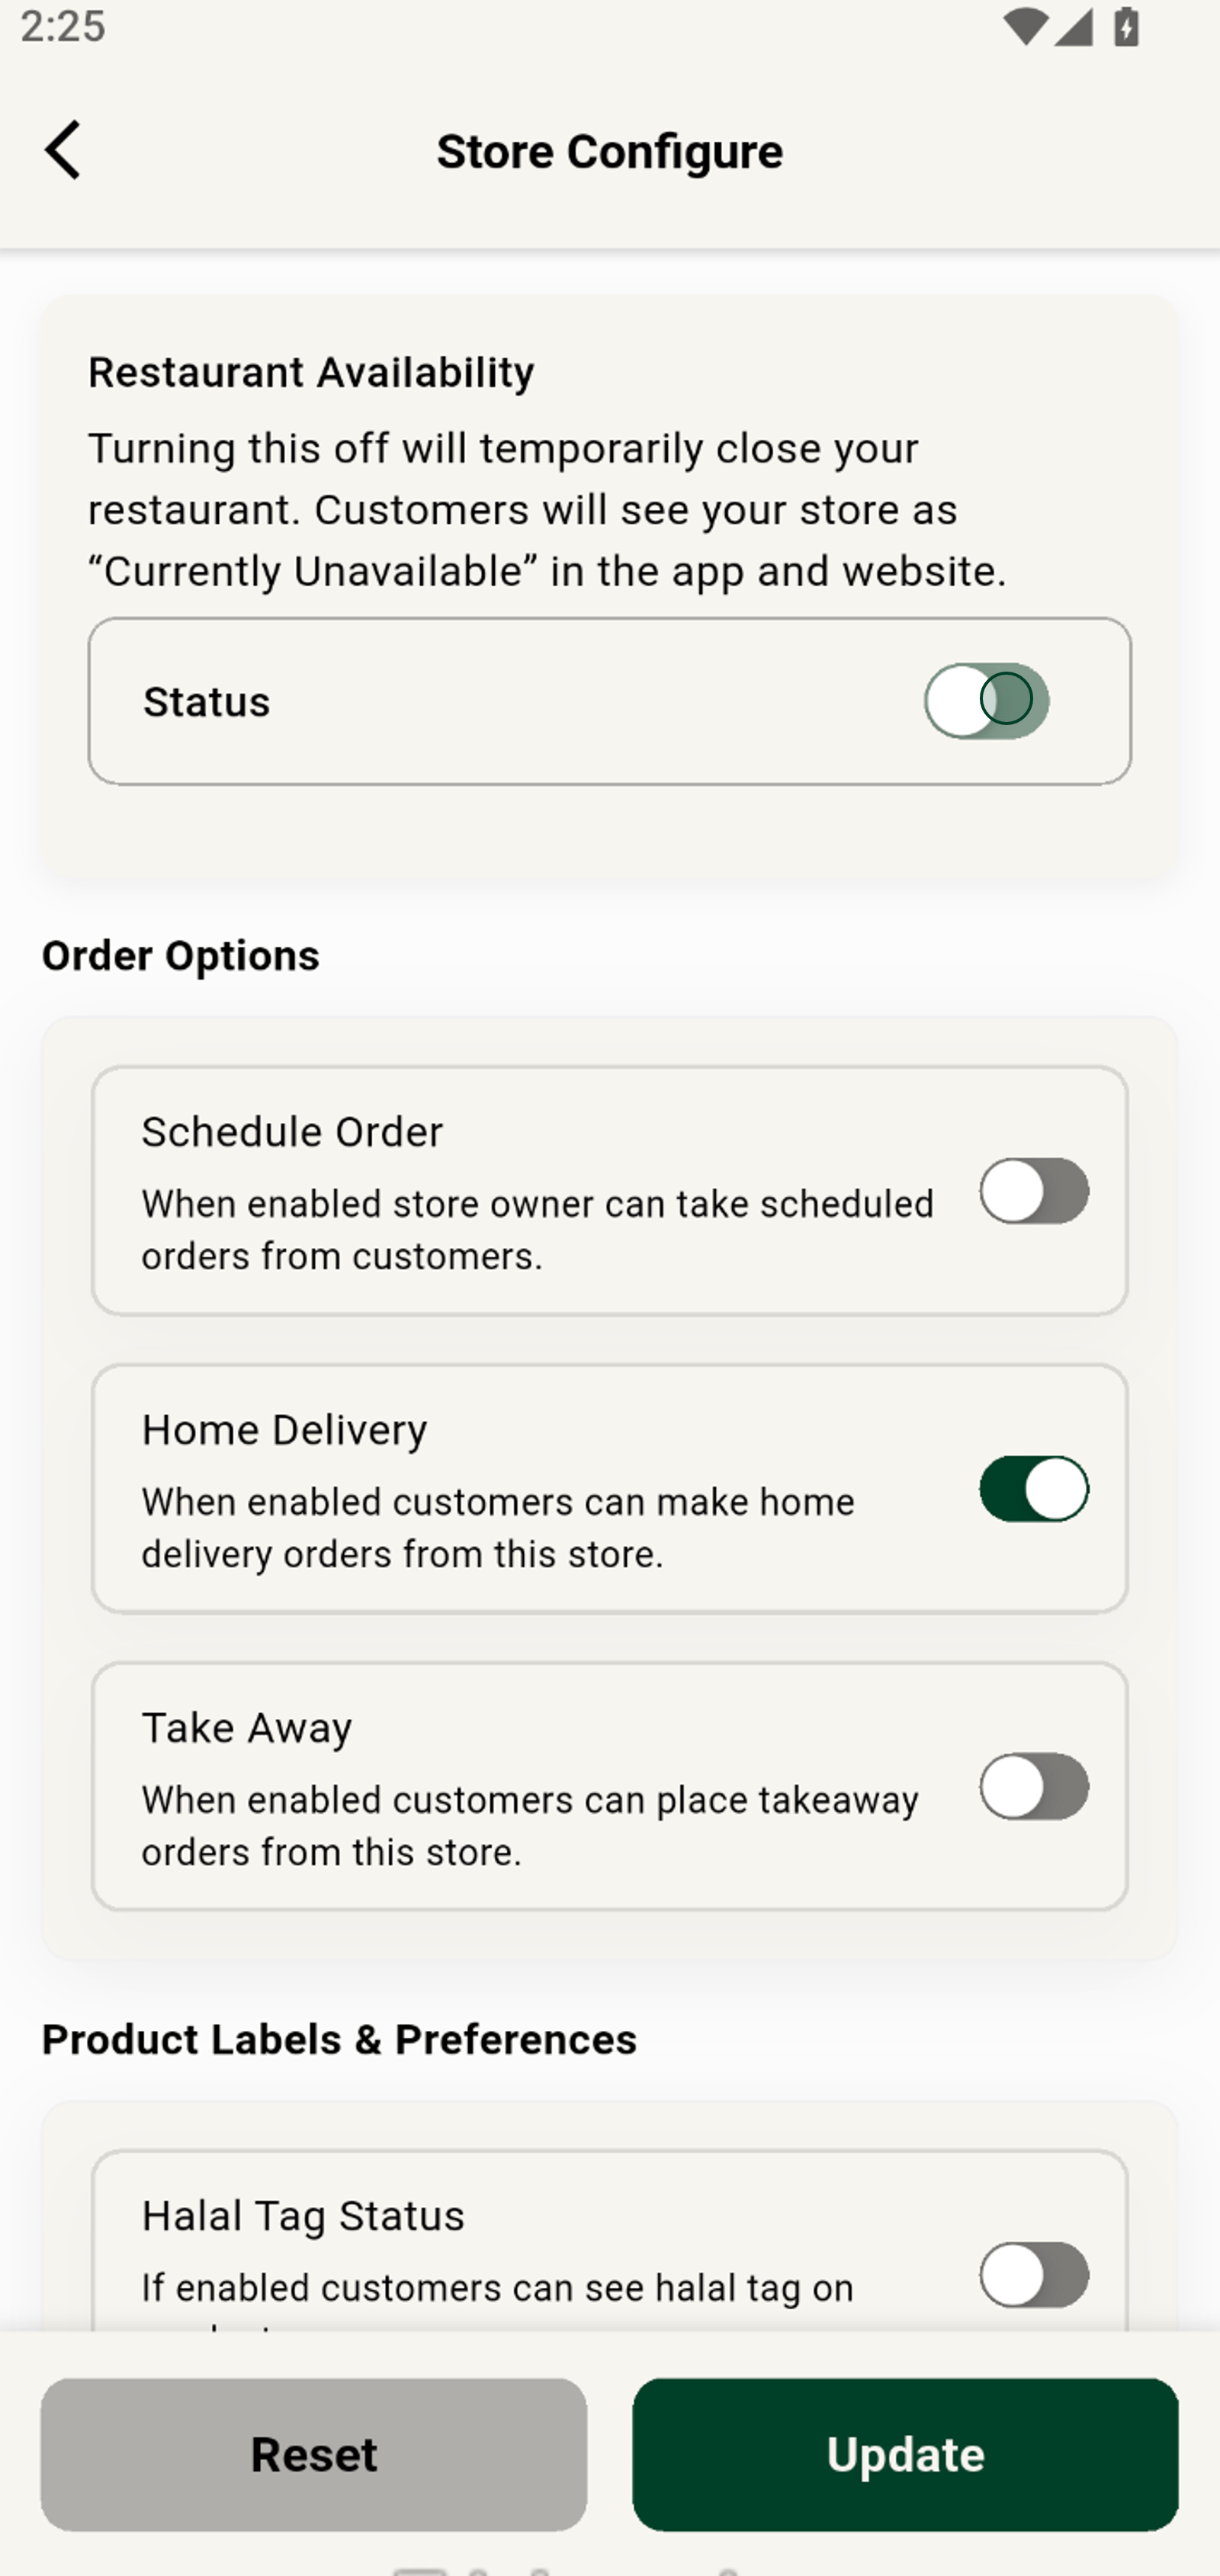
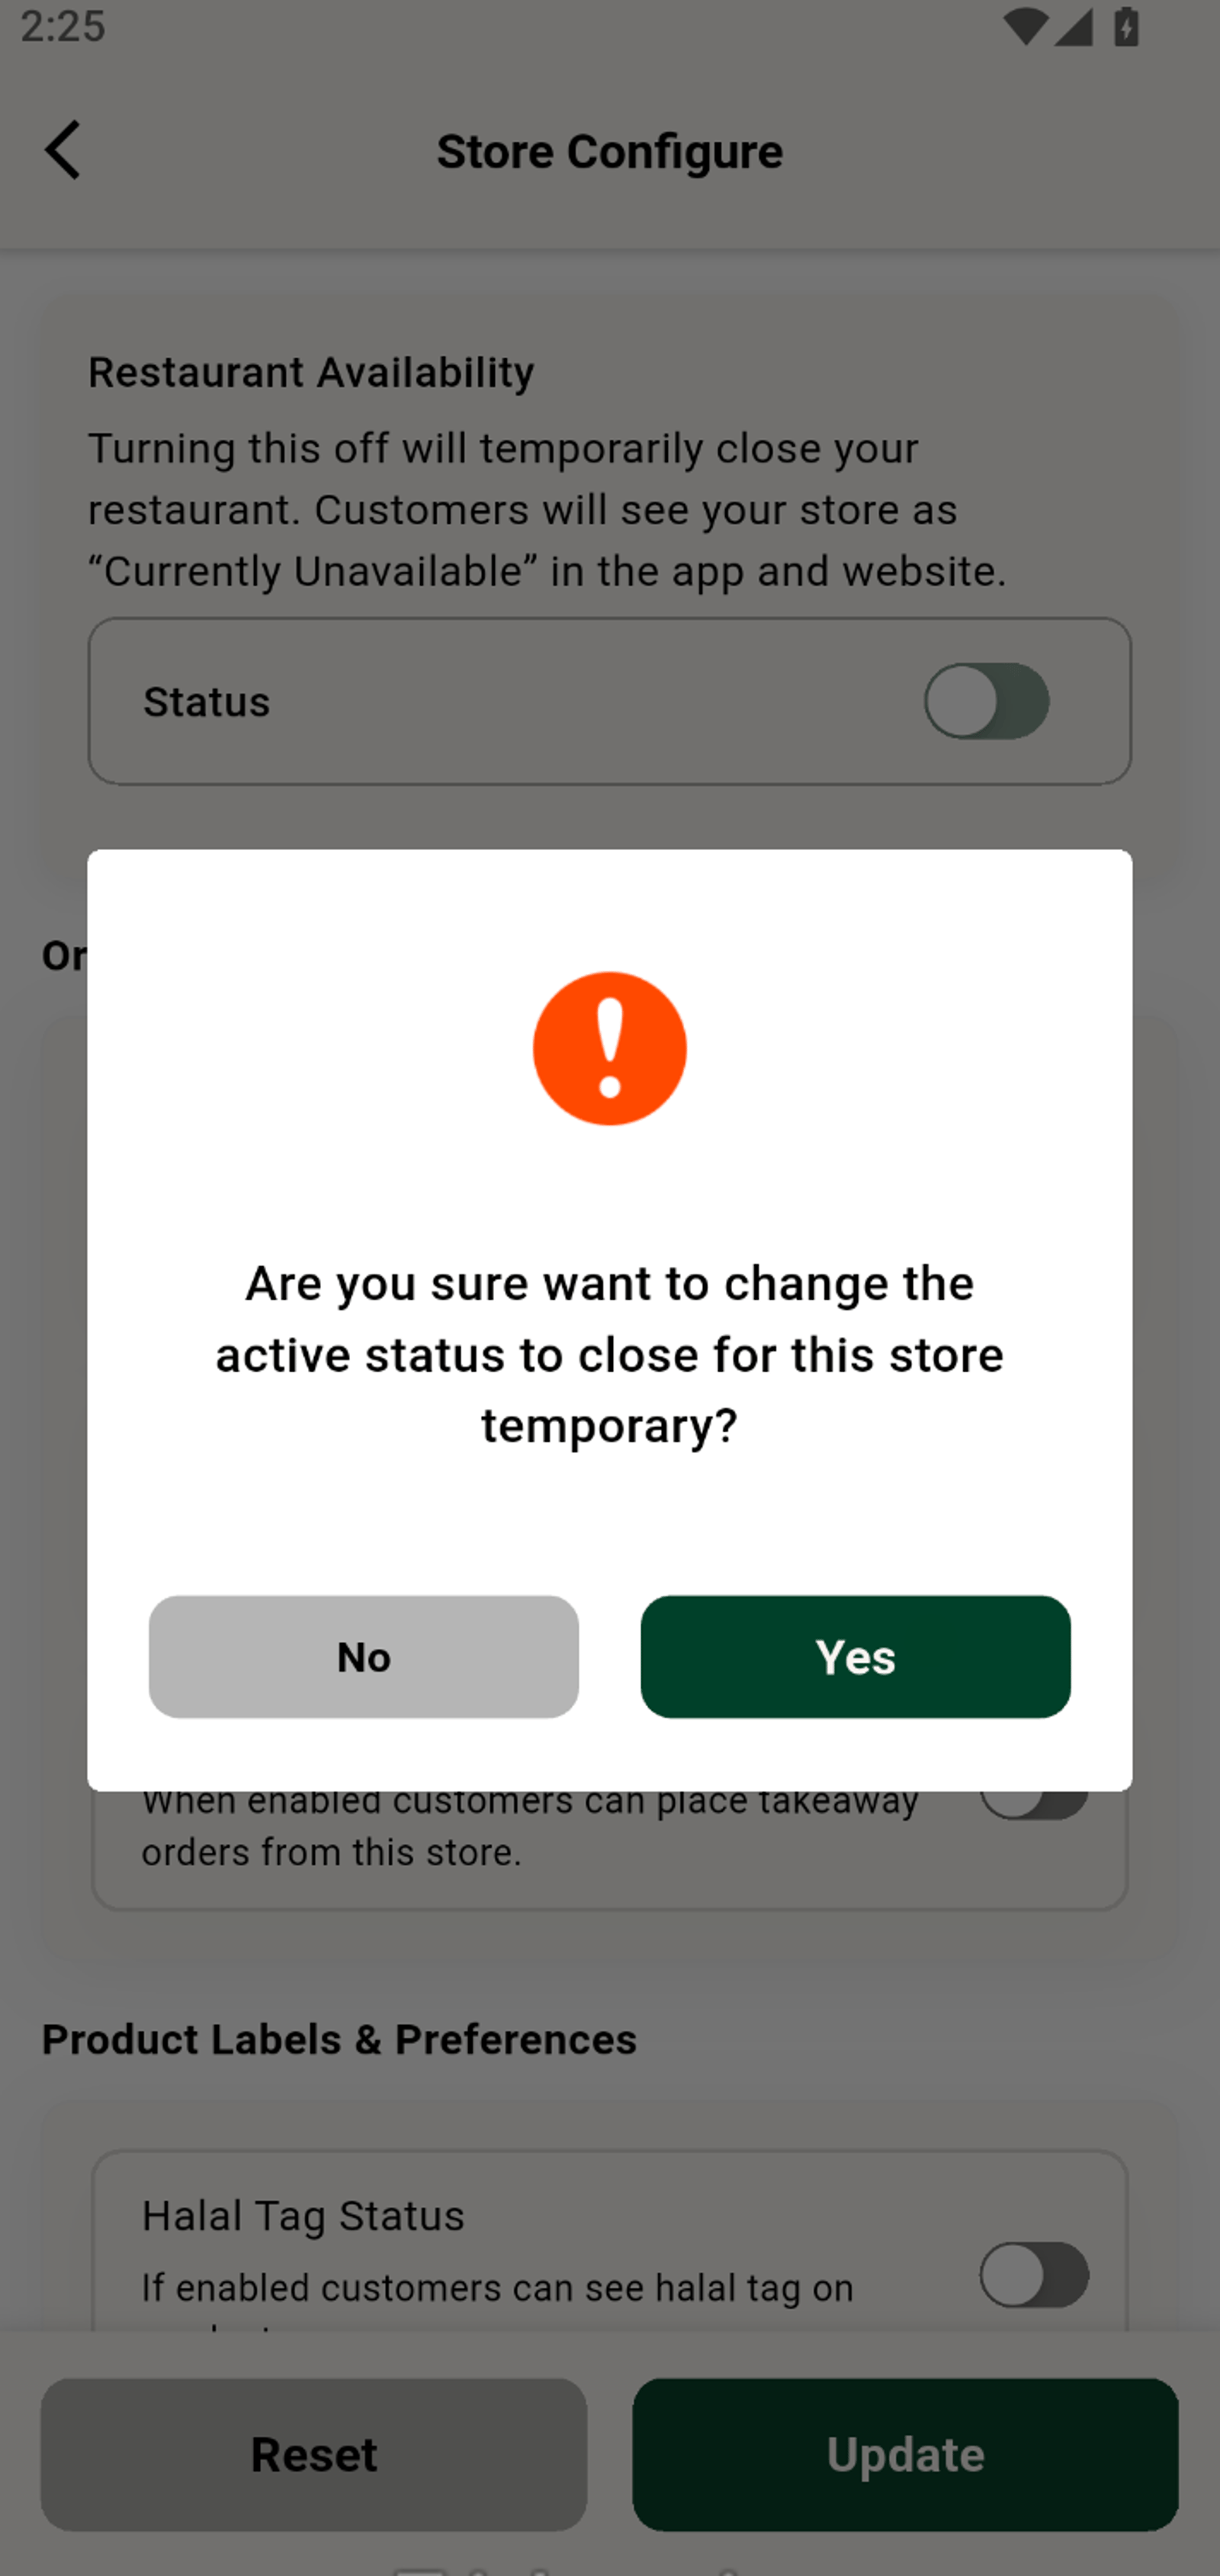
Toggle your store's Status to control live availability with one switch.
4. Click 'Edit' to begin updating the store configuration.
Confirm your availability update to instantly reflect changes for customers.
5. Adjust the store name or description as needed.
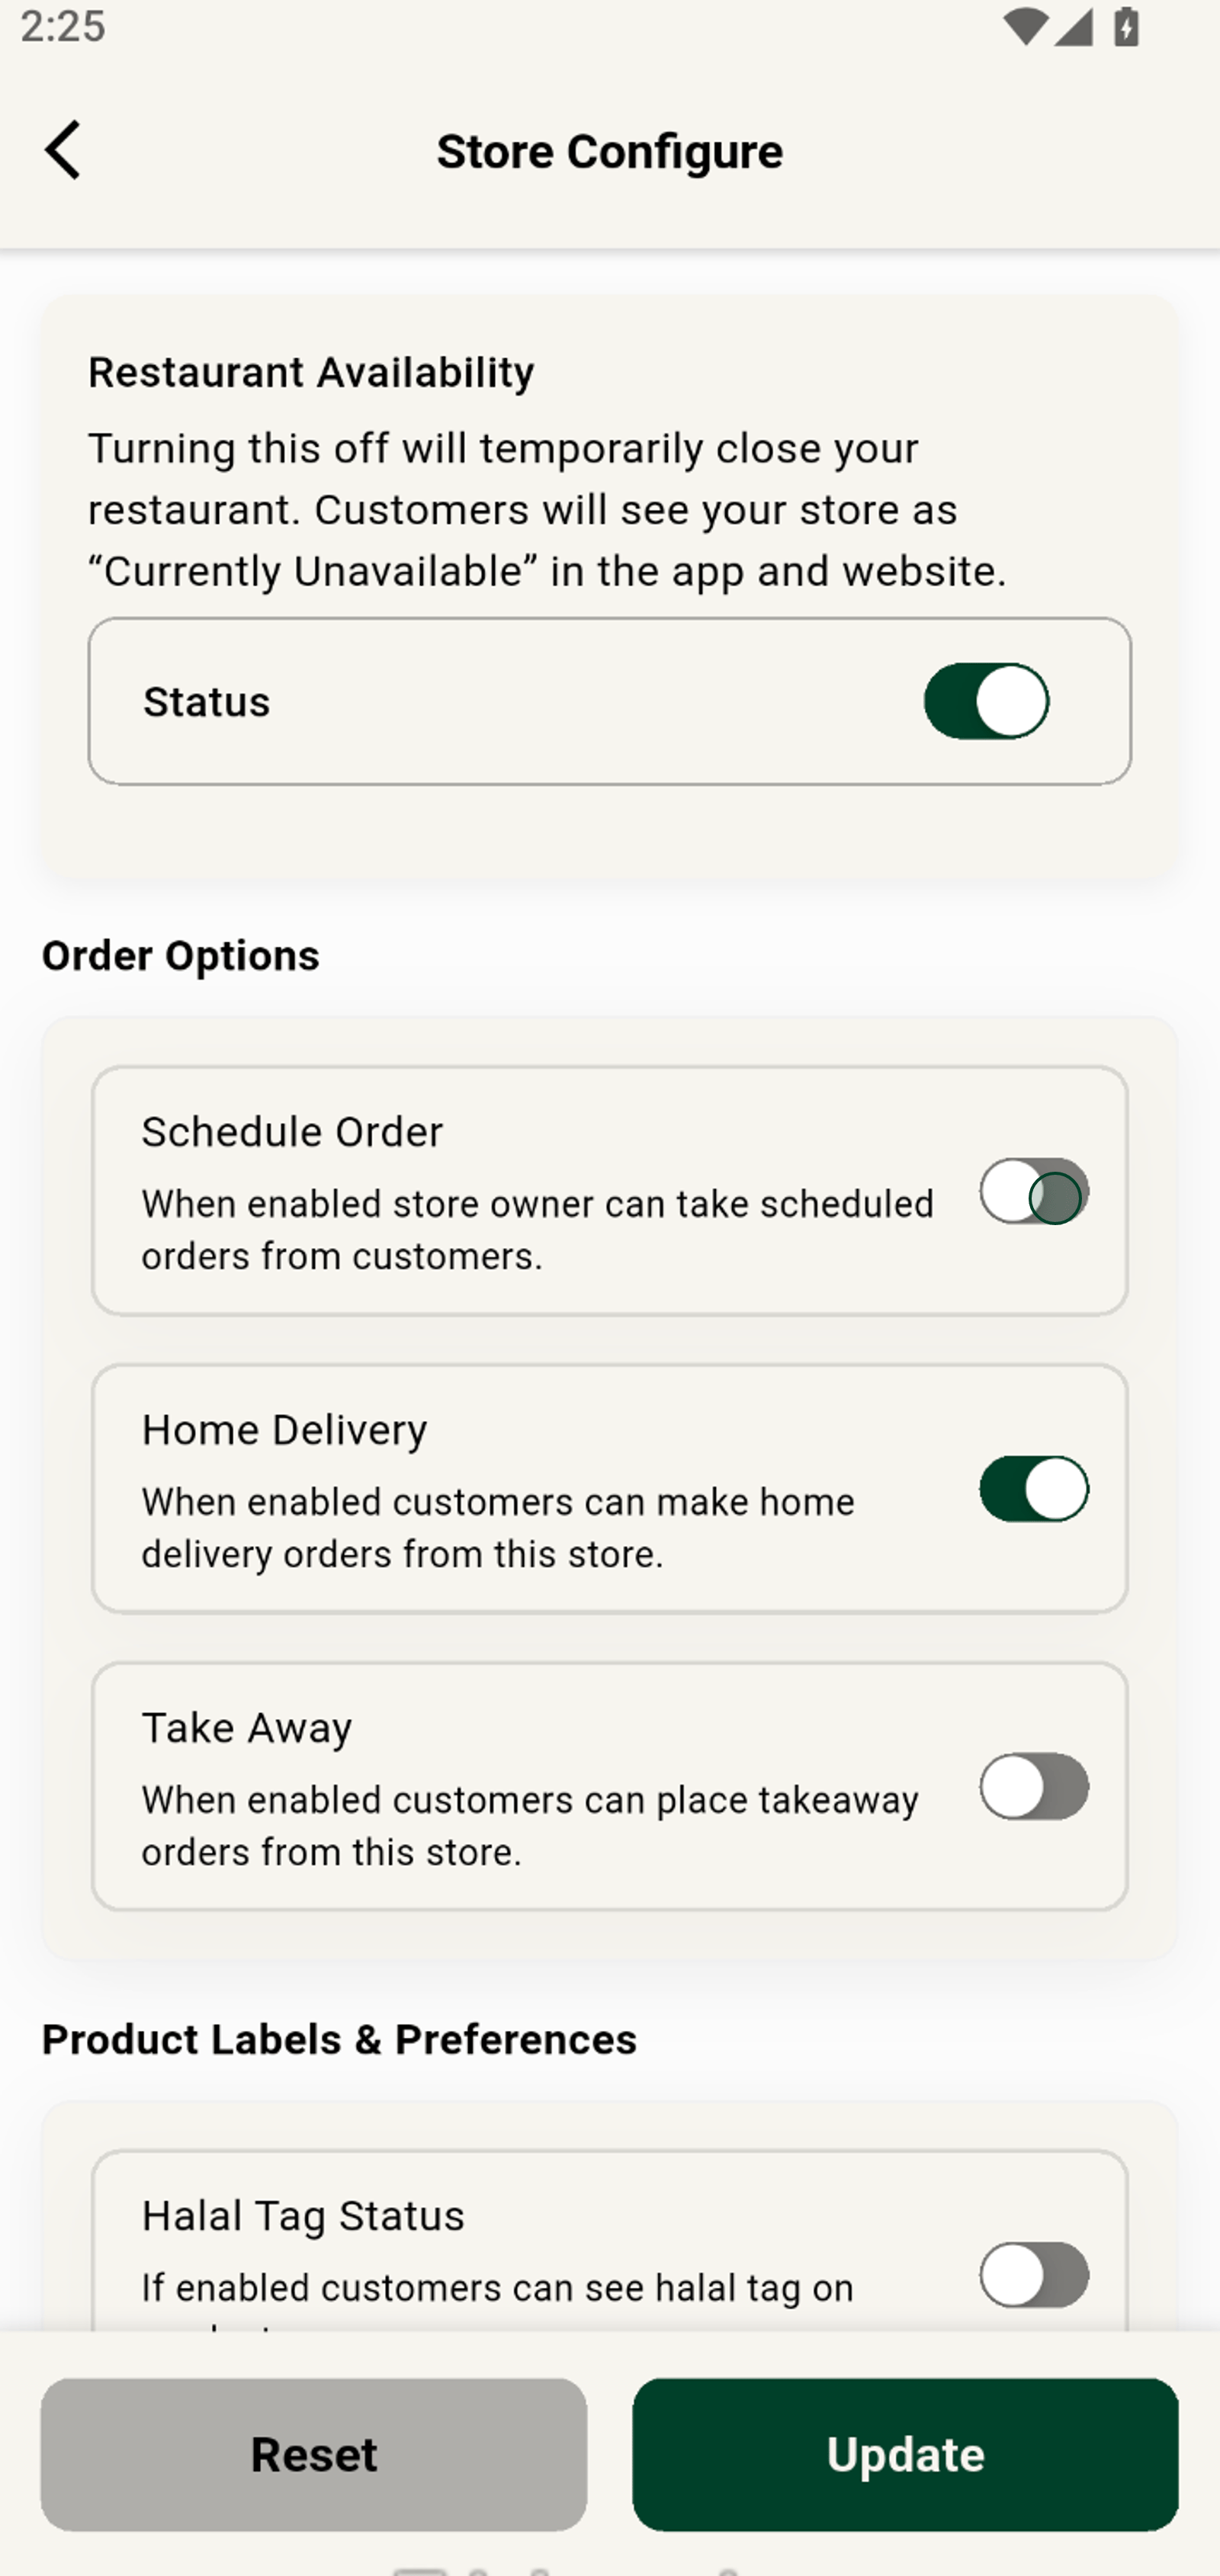
Use Schedule Order to let customers place orders in advance with ease.
6. Update the store address to reflect current information.
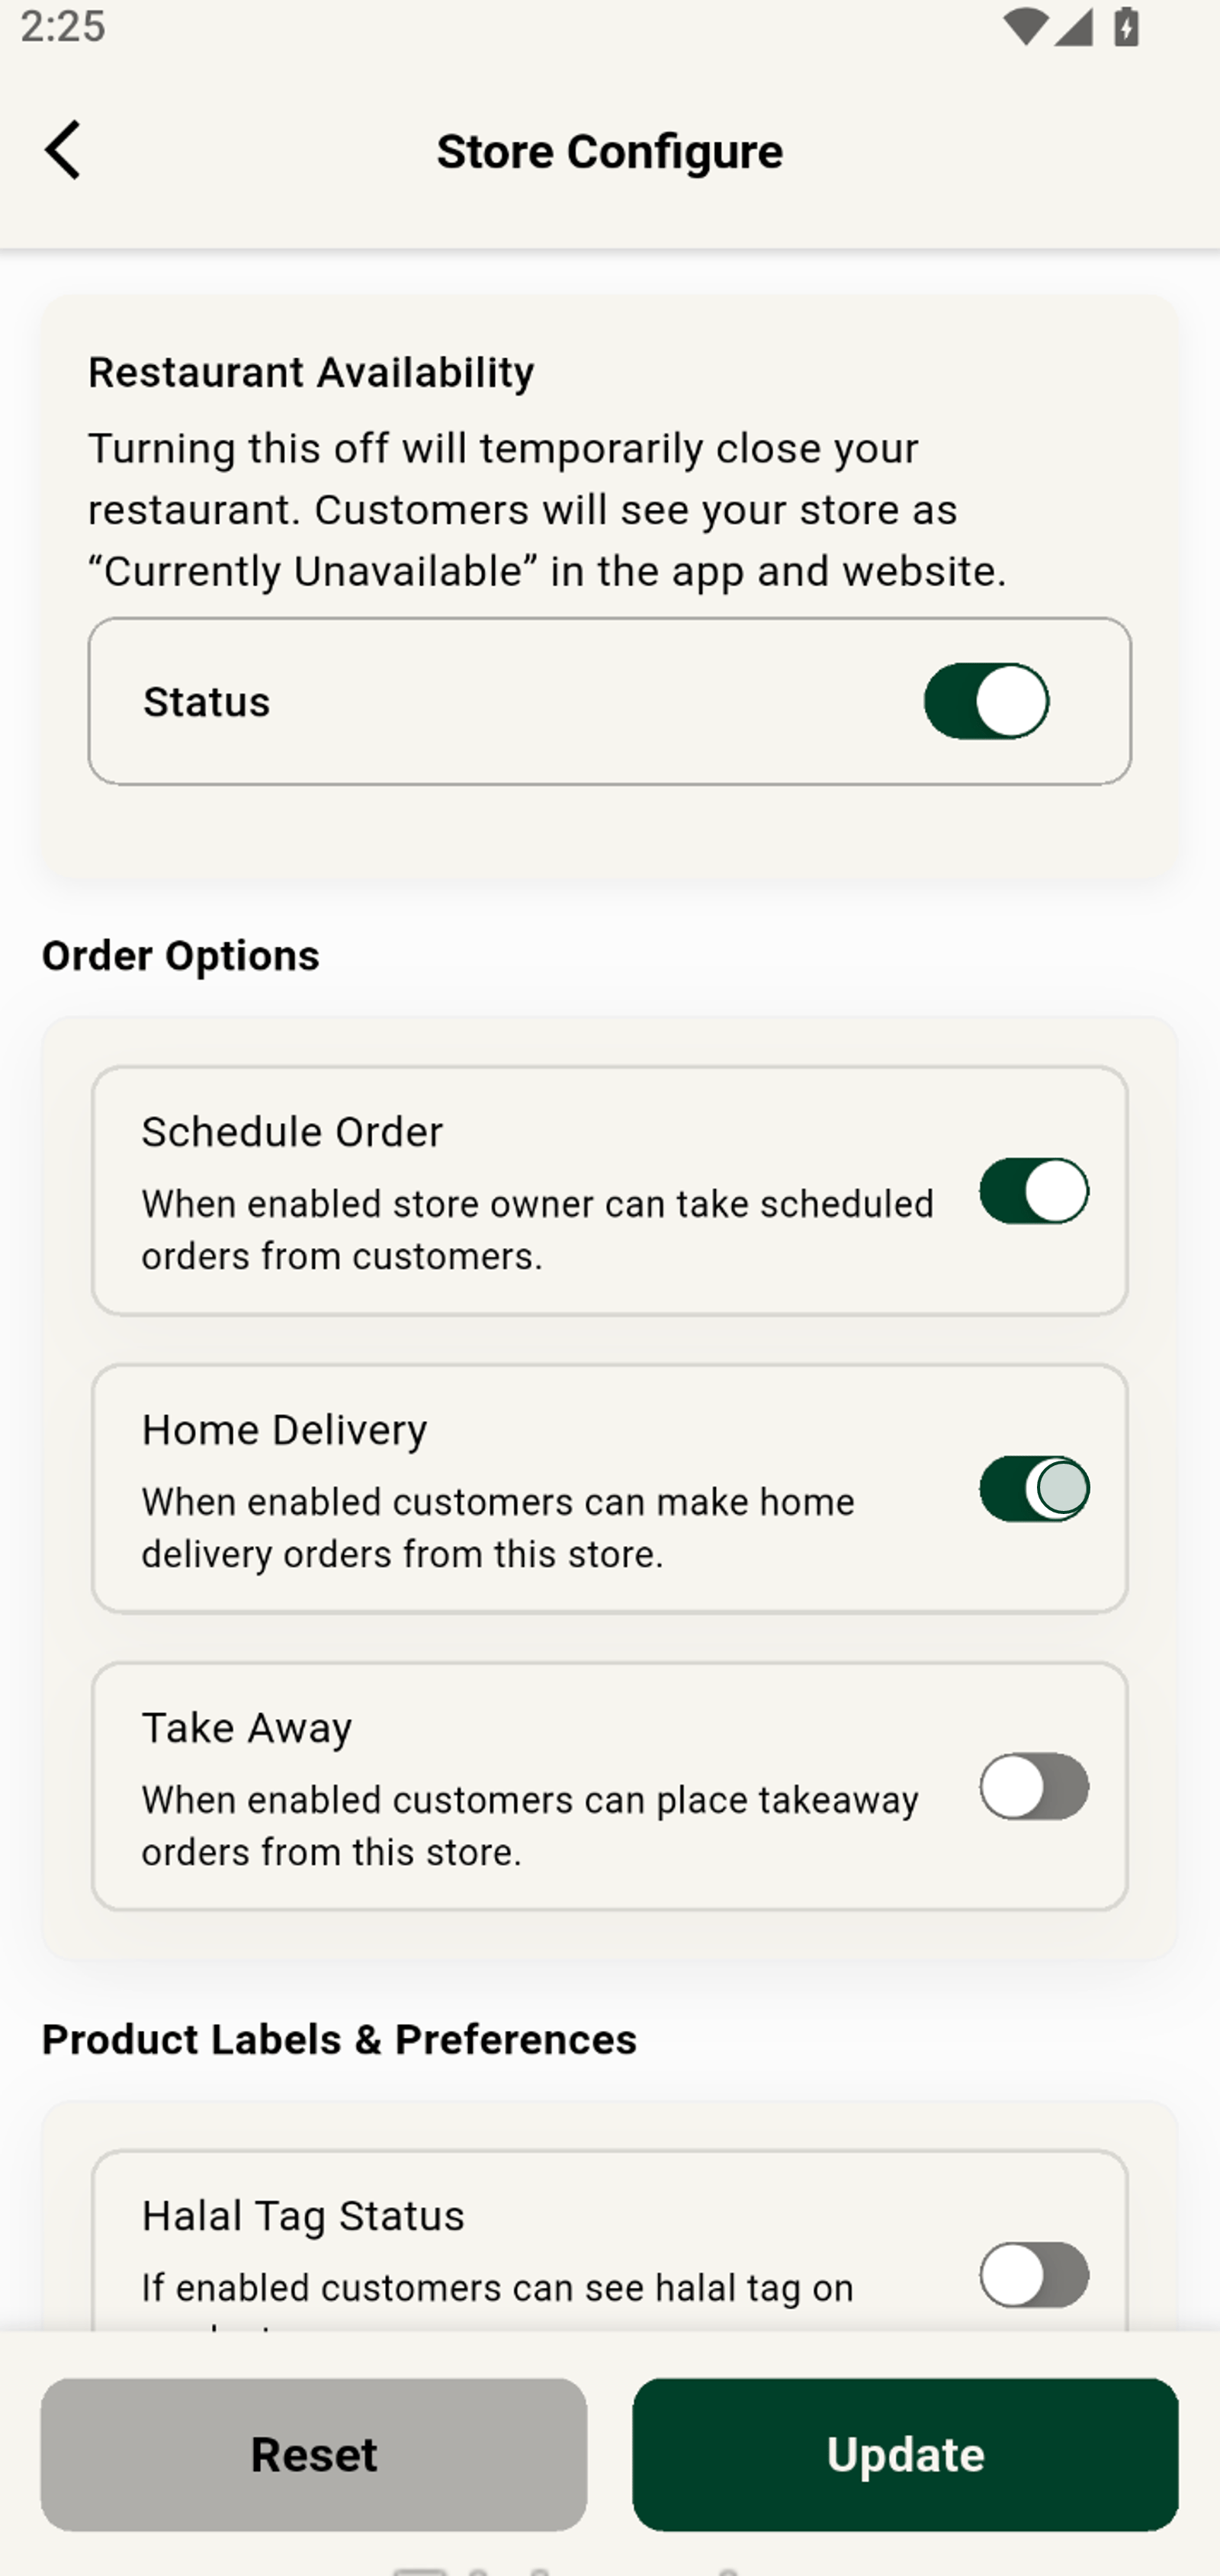
Turn Home Delivery on or off to adjust your fulfillment options anytime.
7. Modify contact details such as phone number or email.
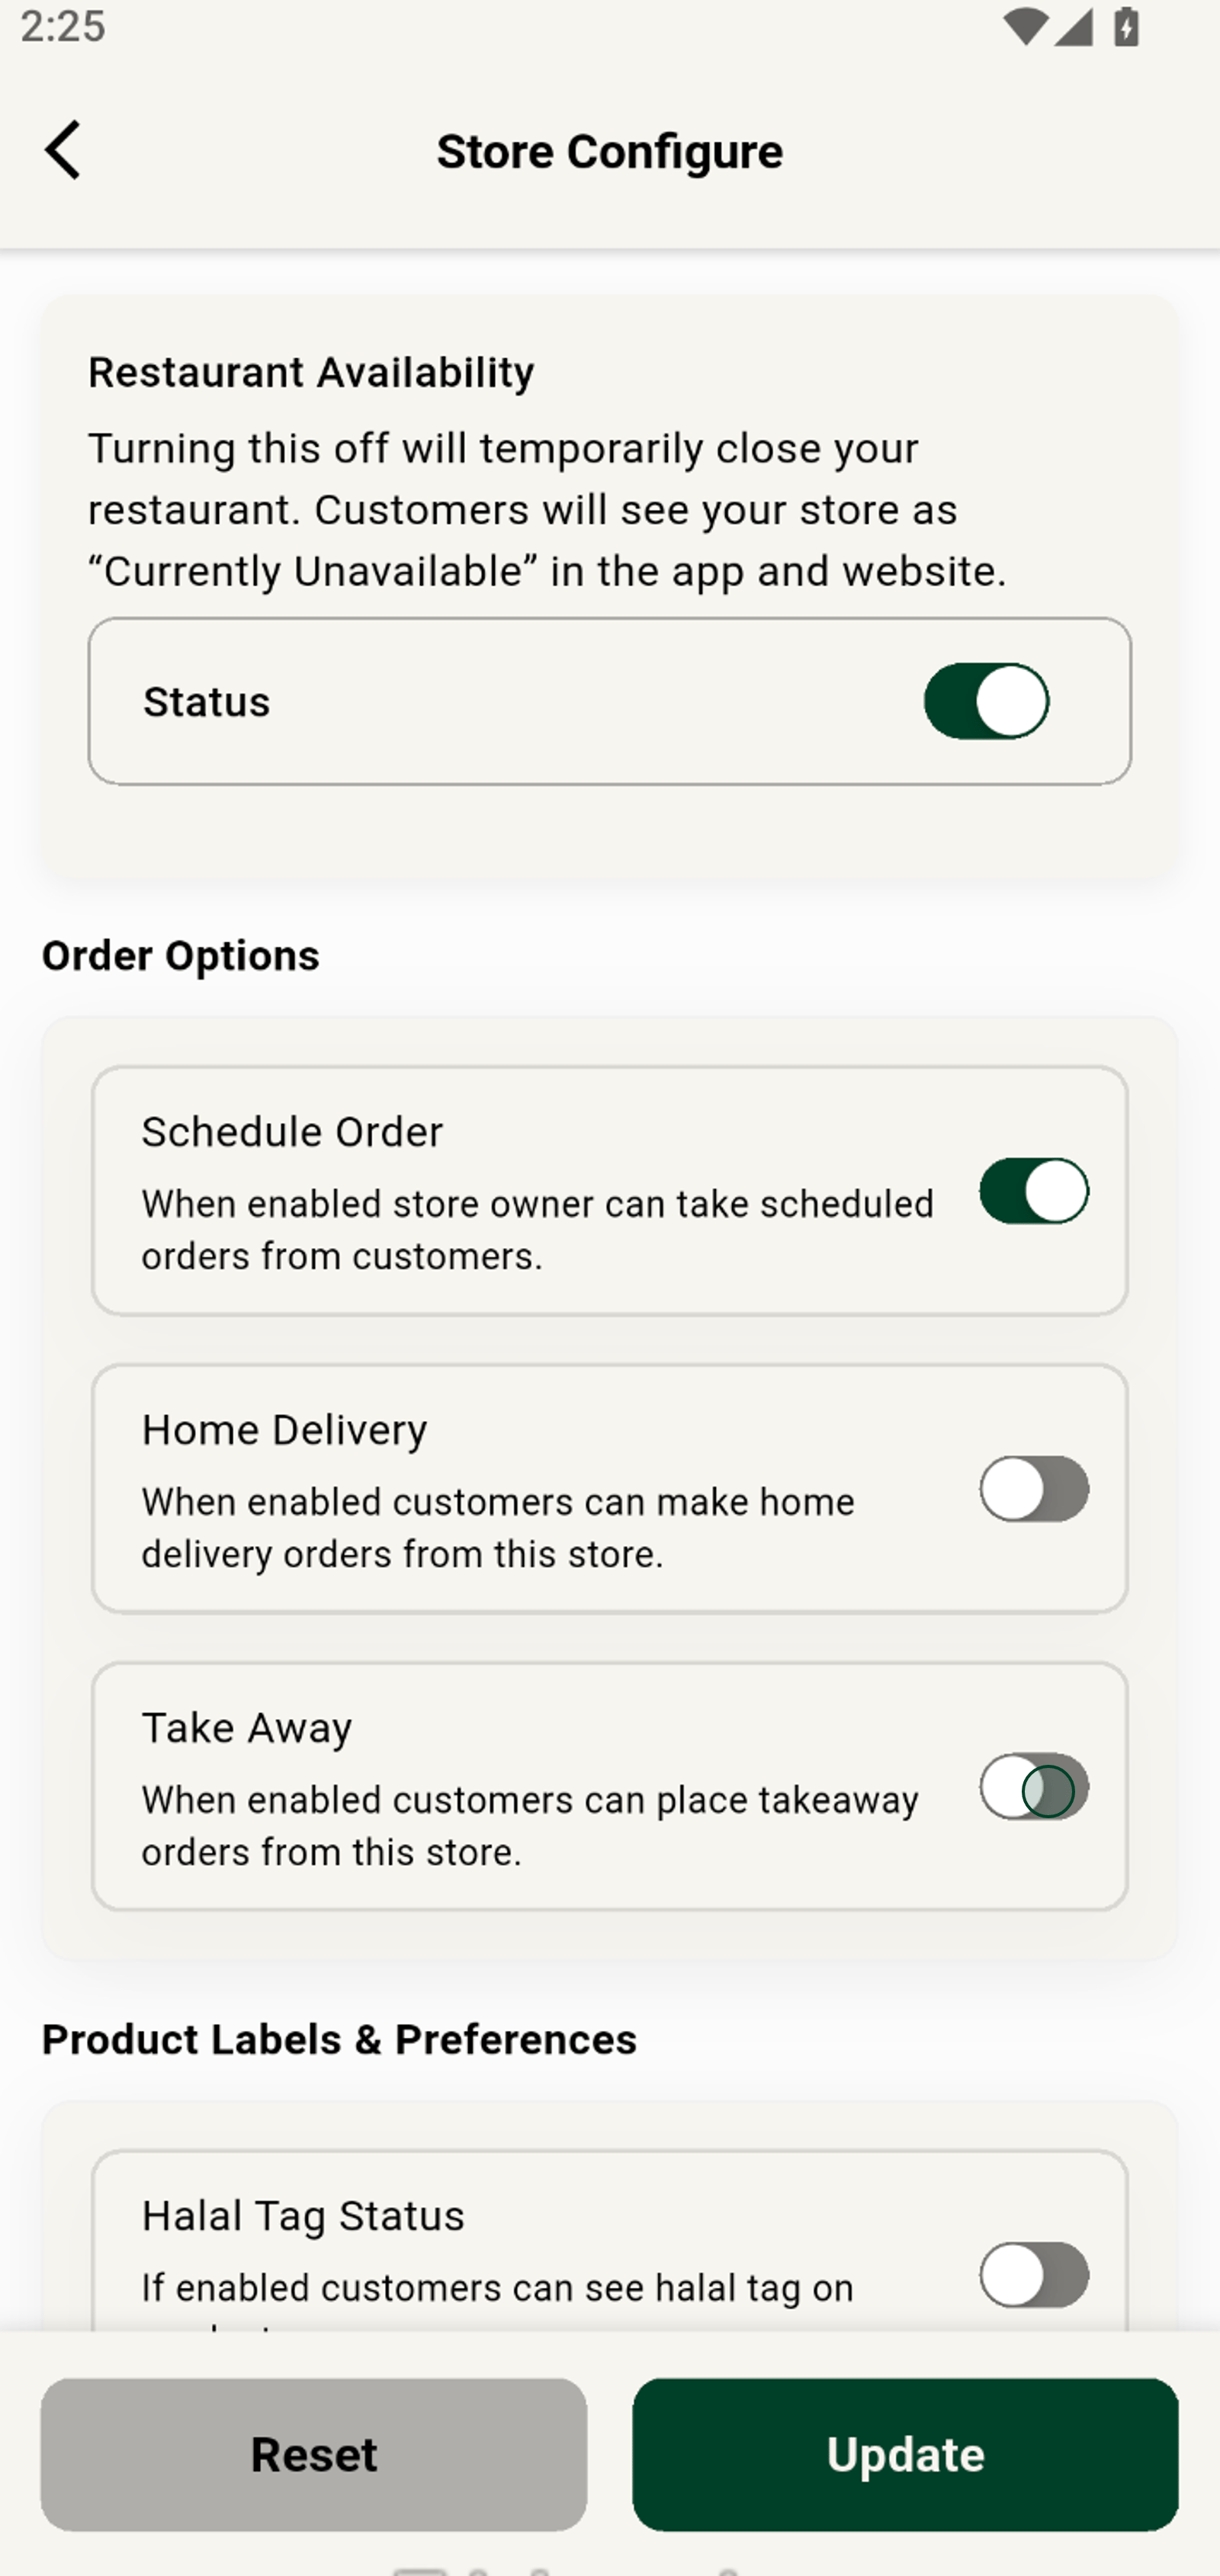
Activate or pause Take Away orders to fit your business needs.
8. Upload a new store logo for updated branding.
Set the Halal Tag to align your store with customer preferences.
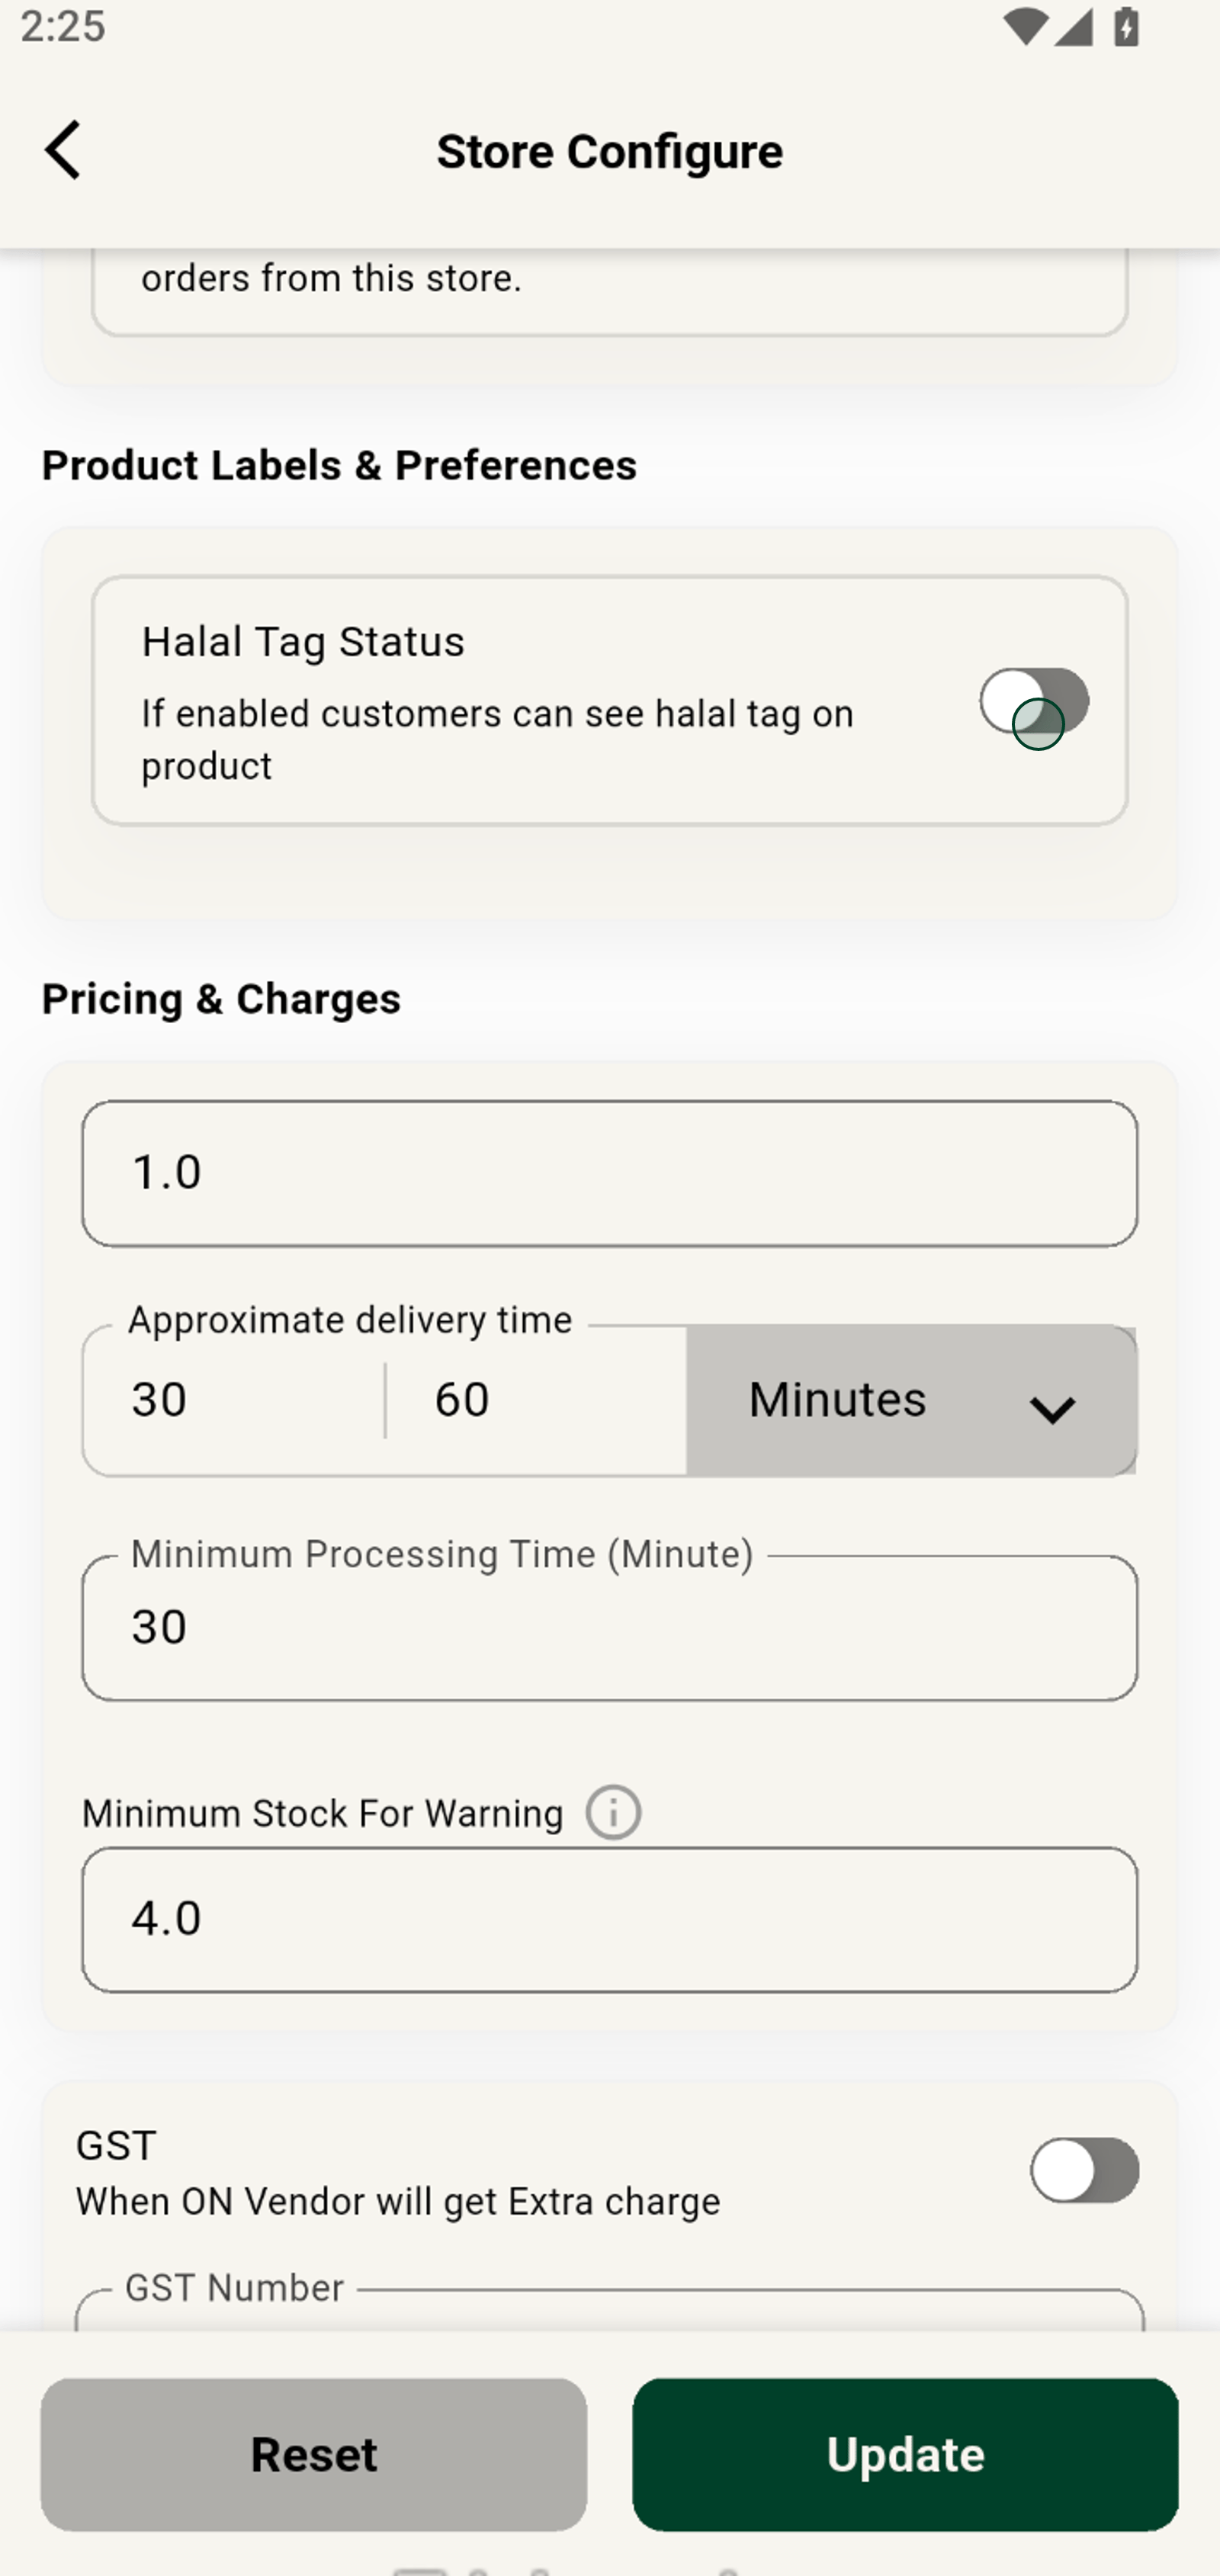
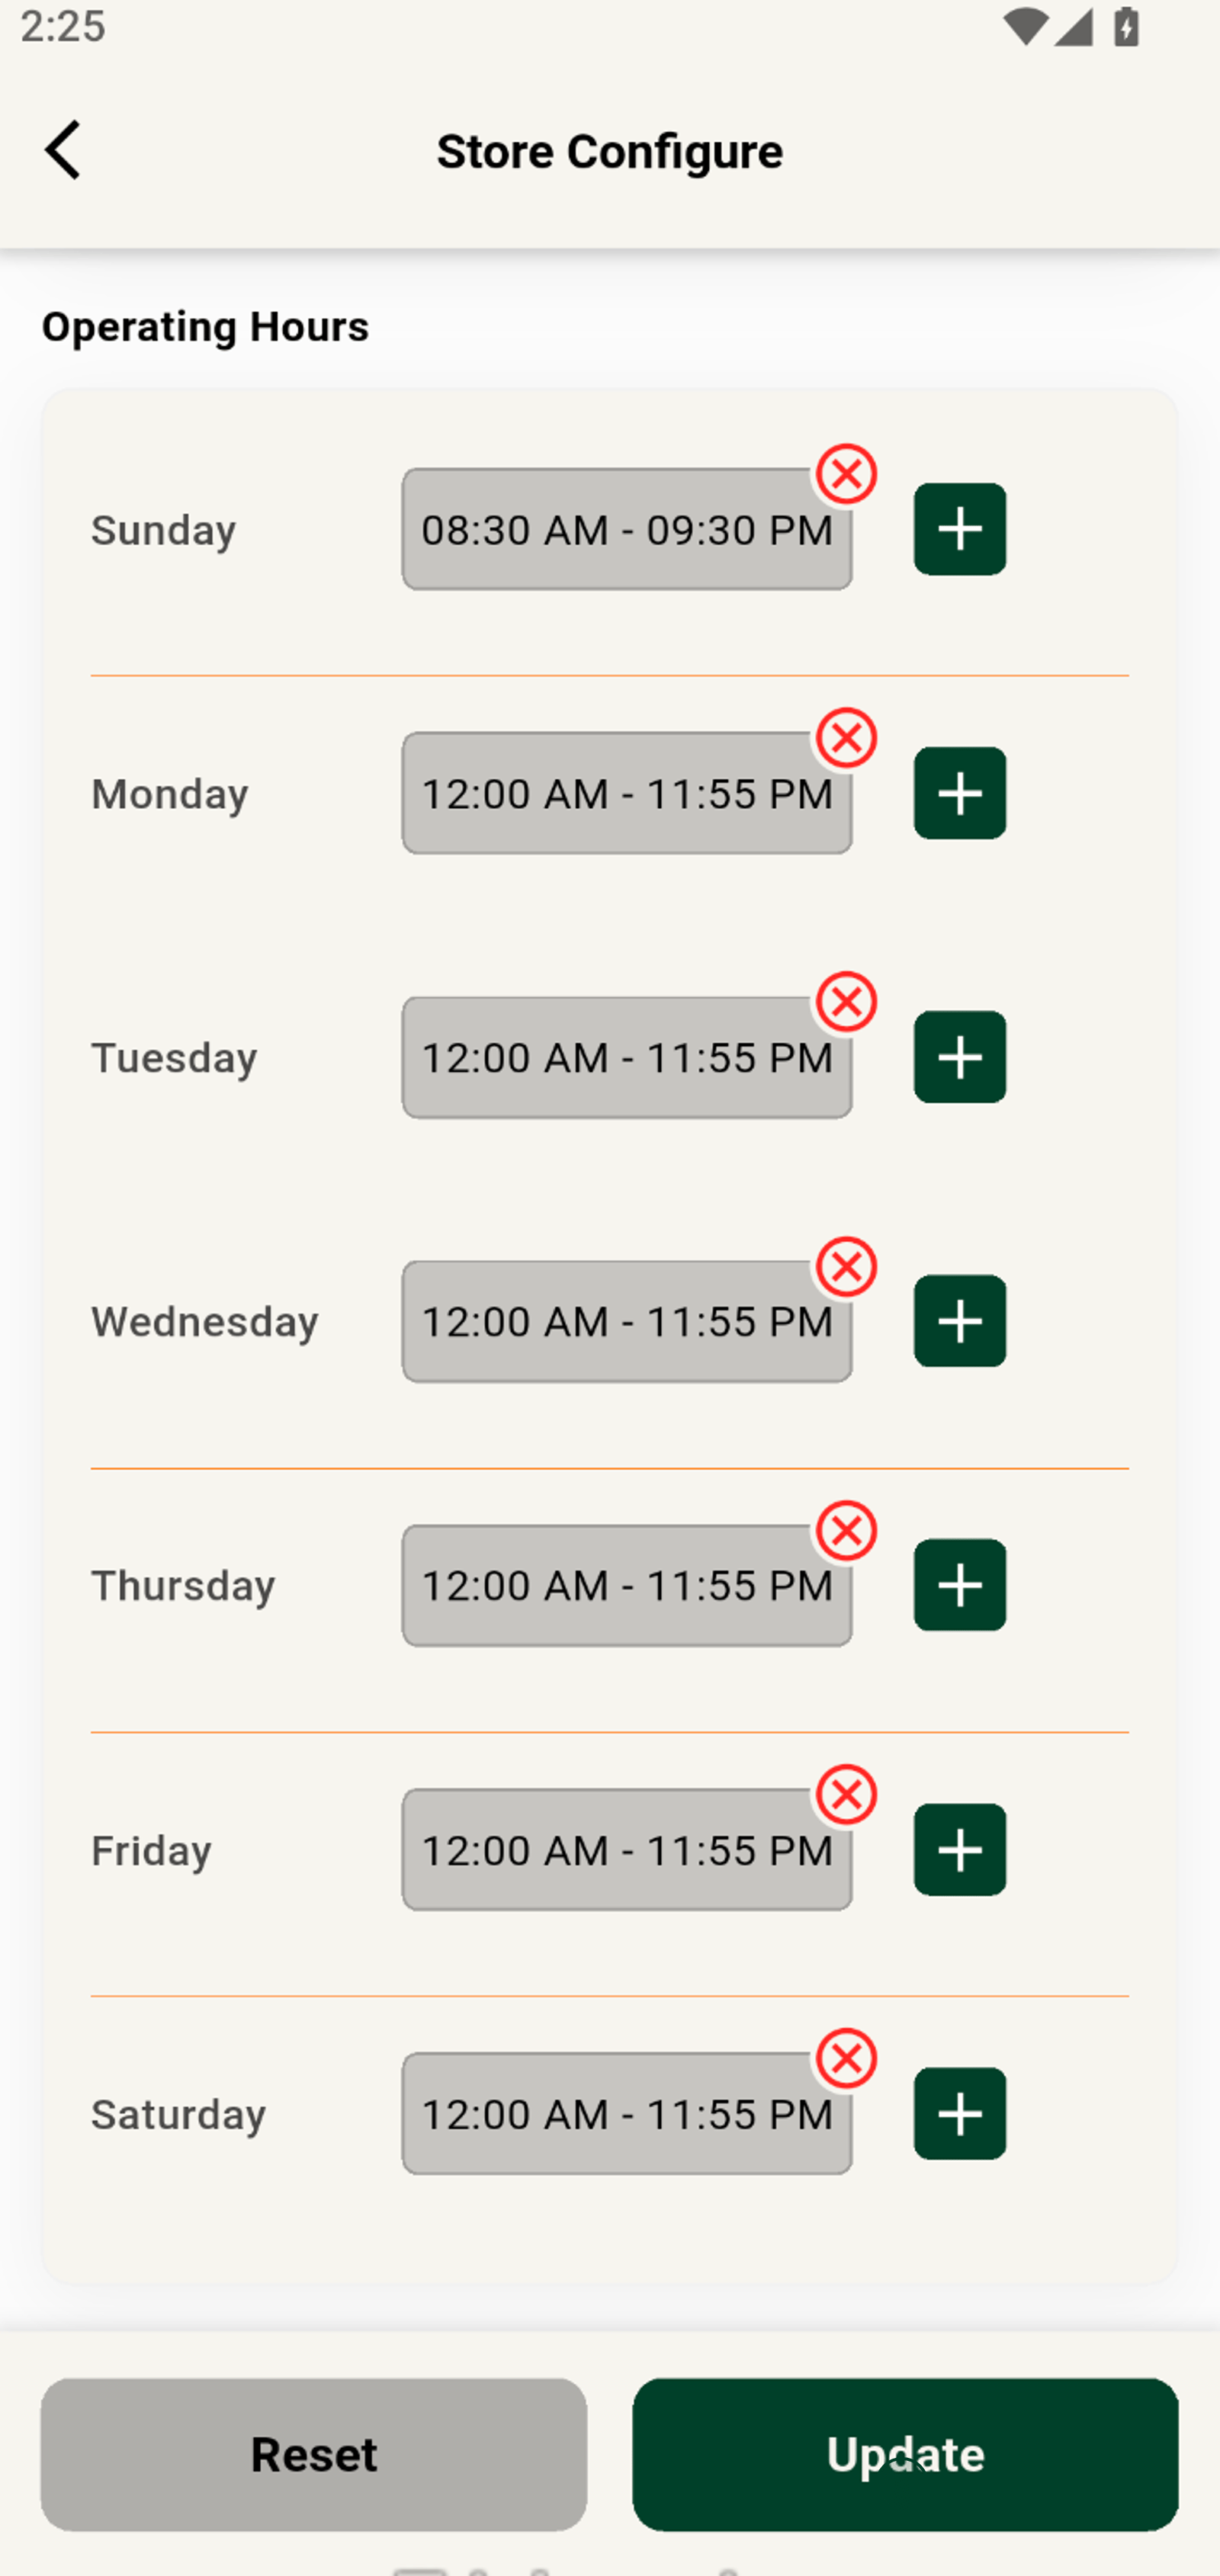
9. Set the store hours to match your operation schedule.
Enable GST to automate extra charges and keep tax compliance simple.
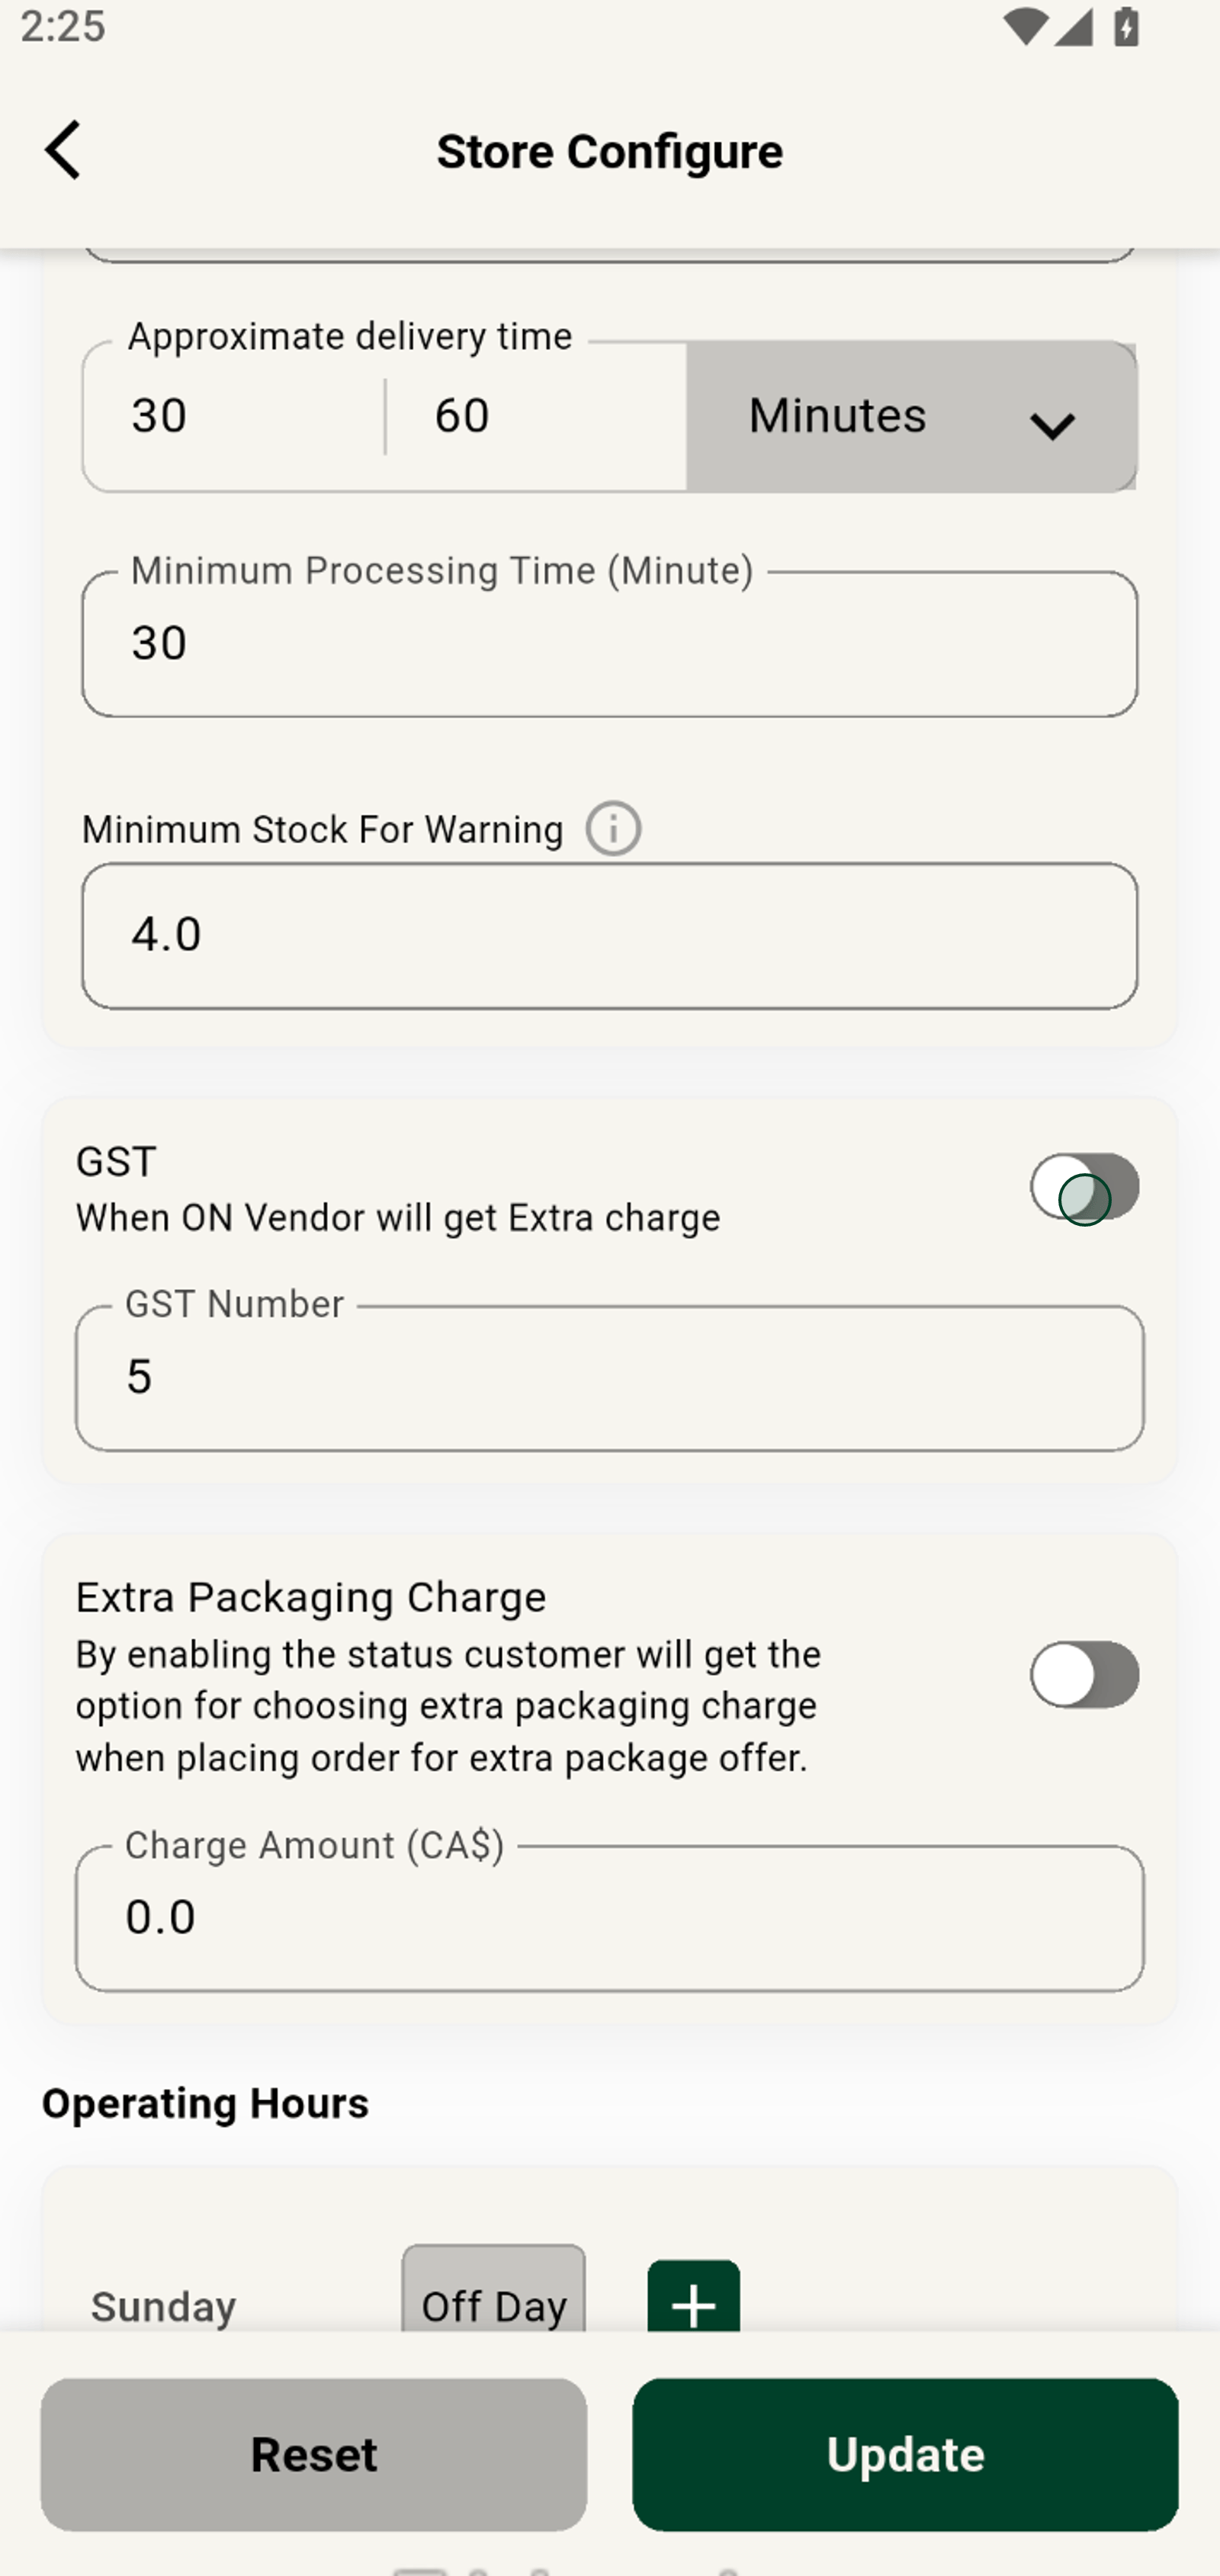
10. Scroll down to configure additional preferences if needed.
Disable or enable extra packaging Charge to streamline your pricing for customers.
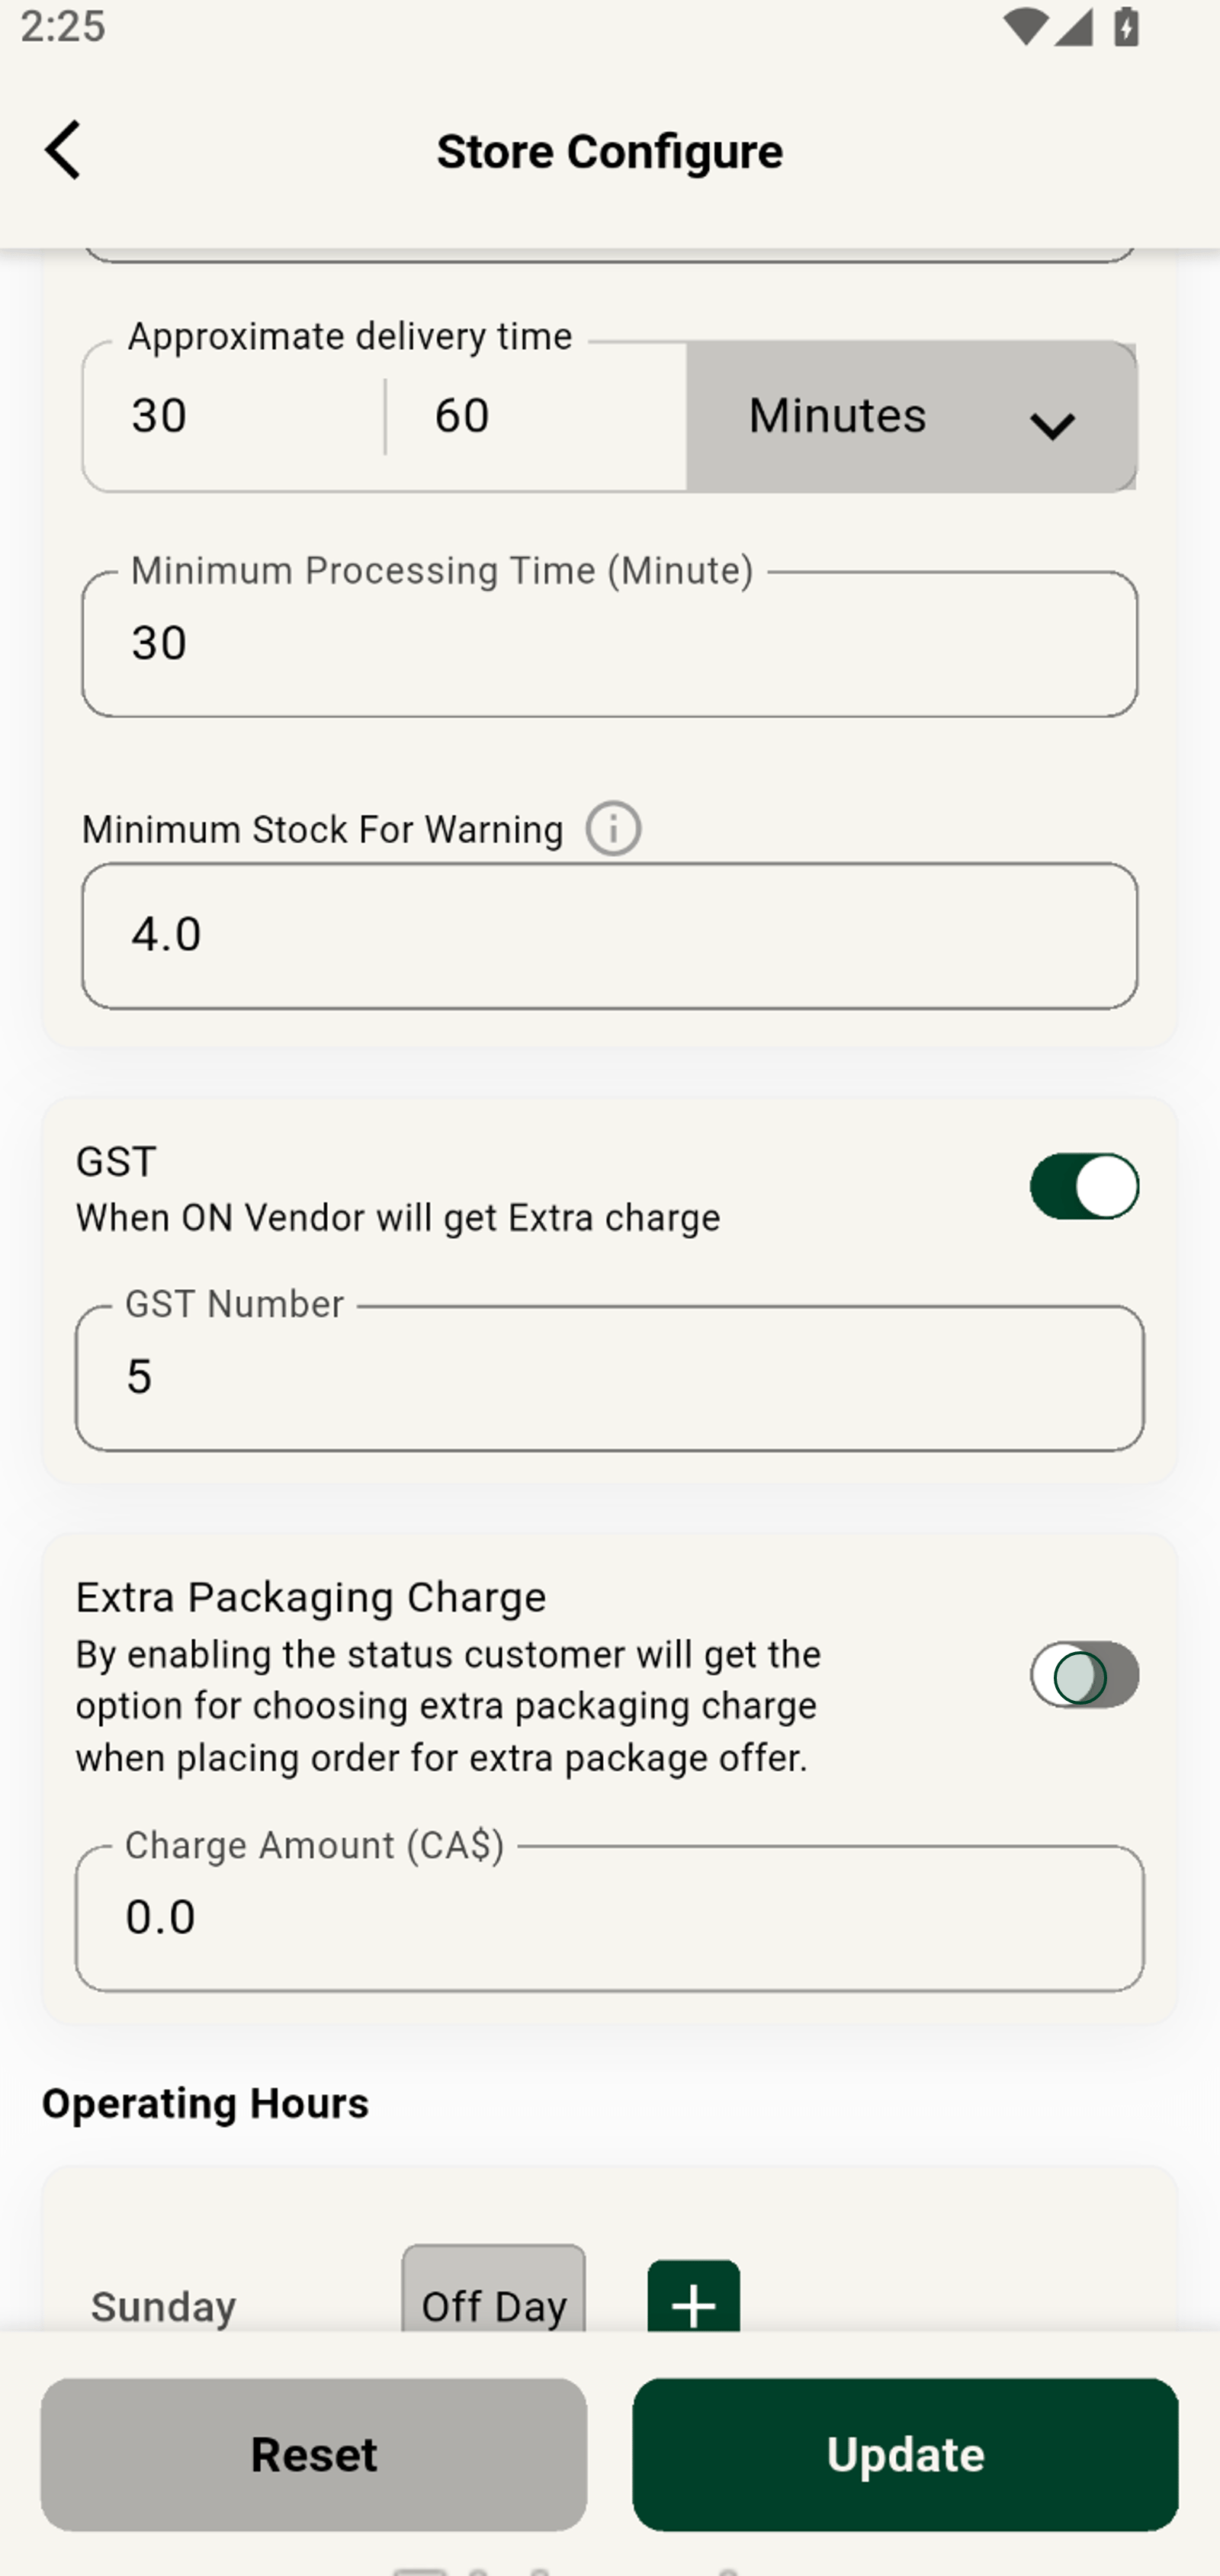
11. Save your changes with the 'Save' button to apply updates.
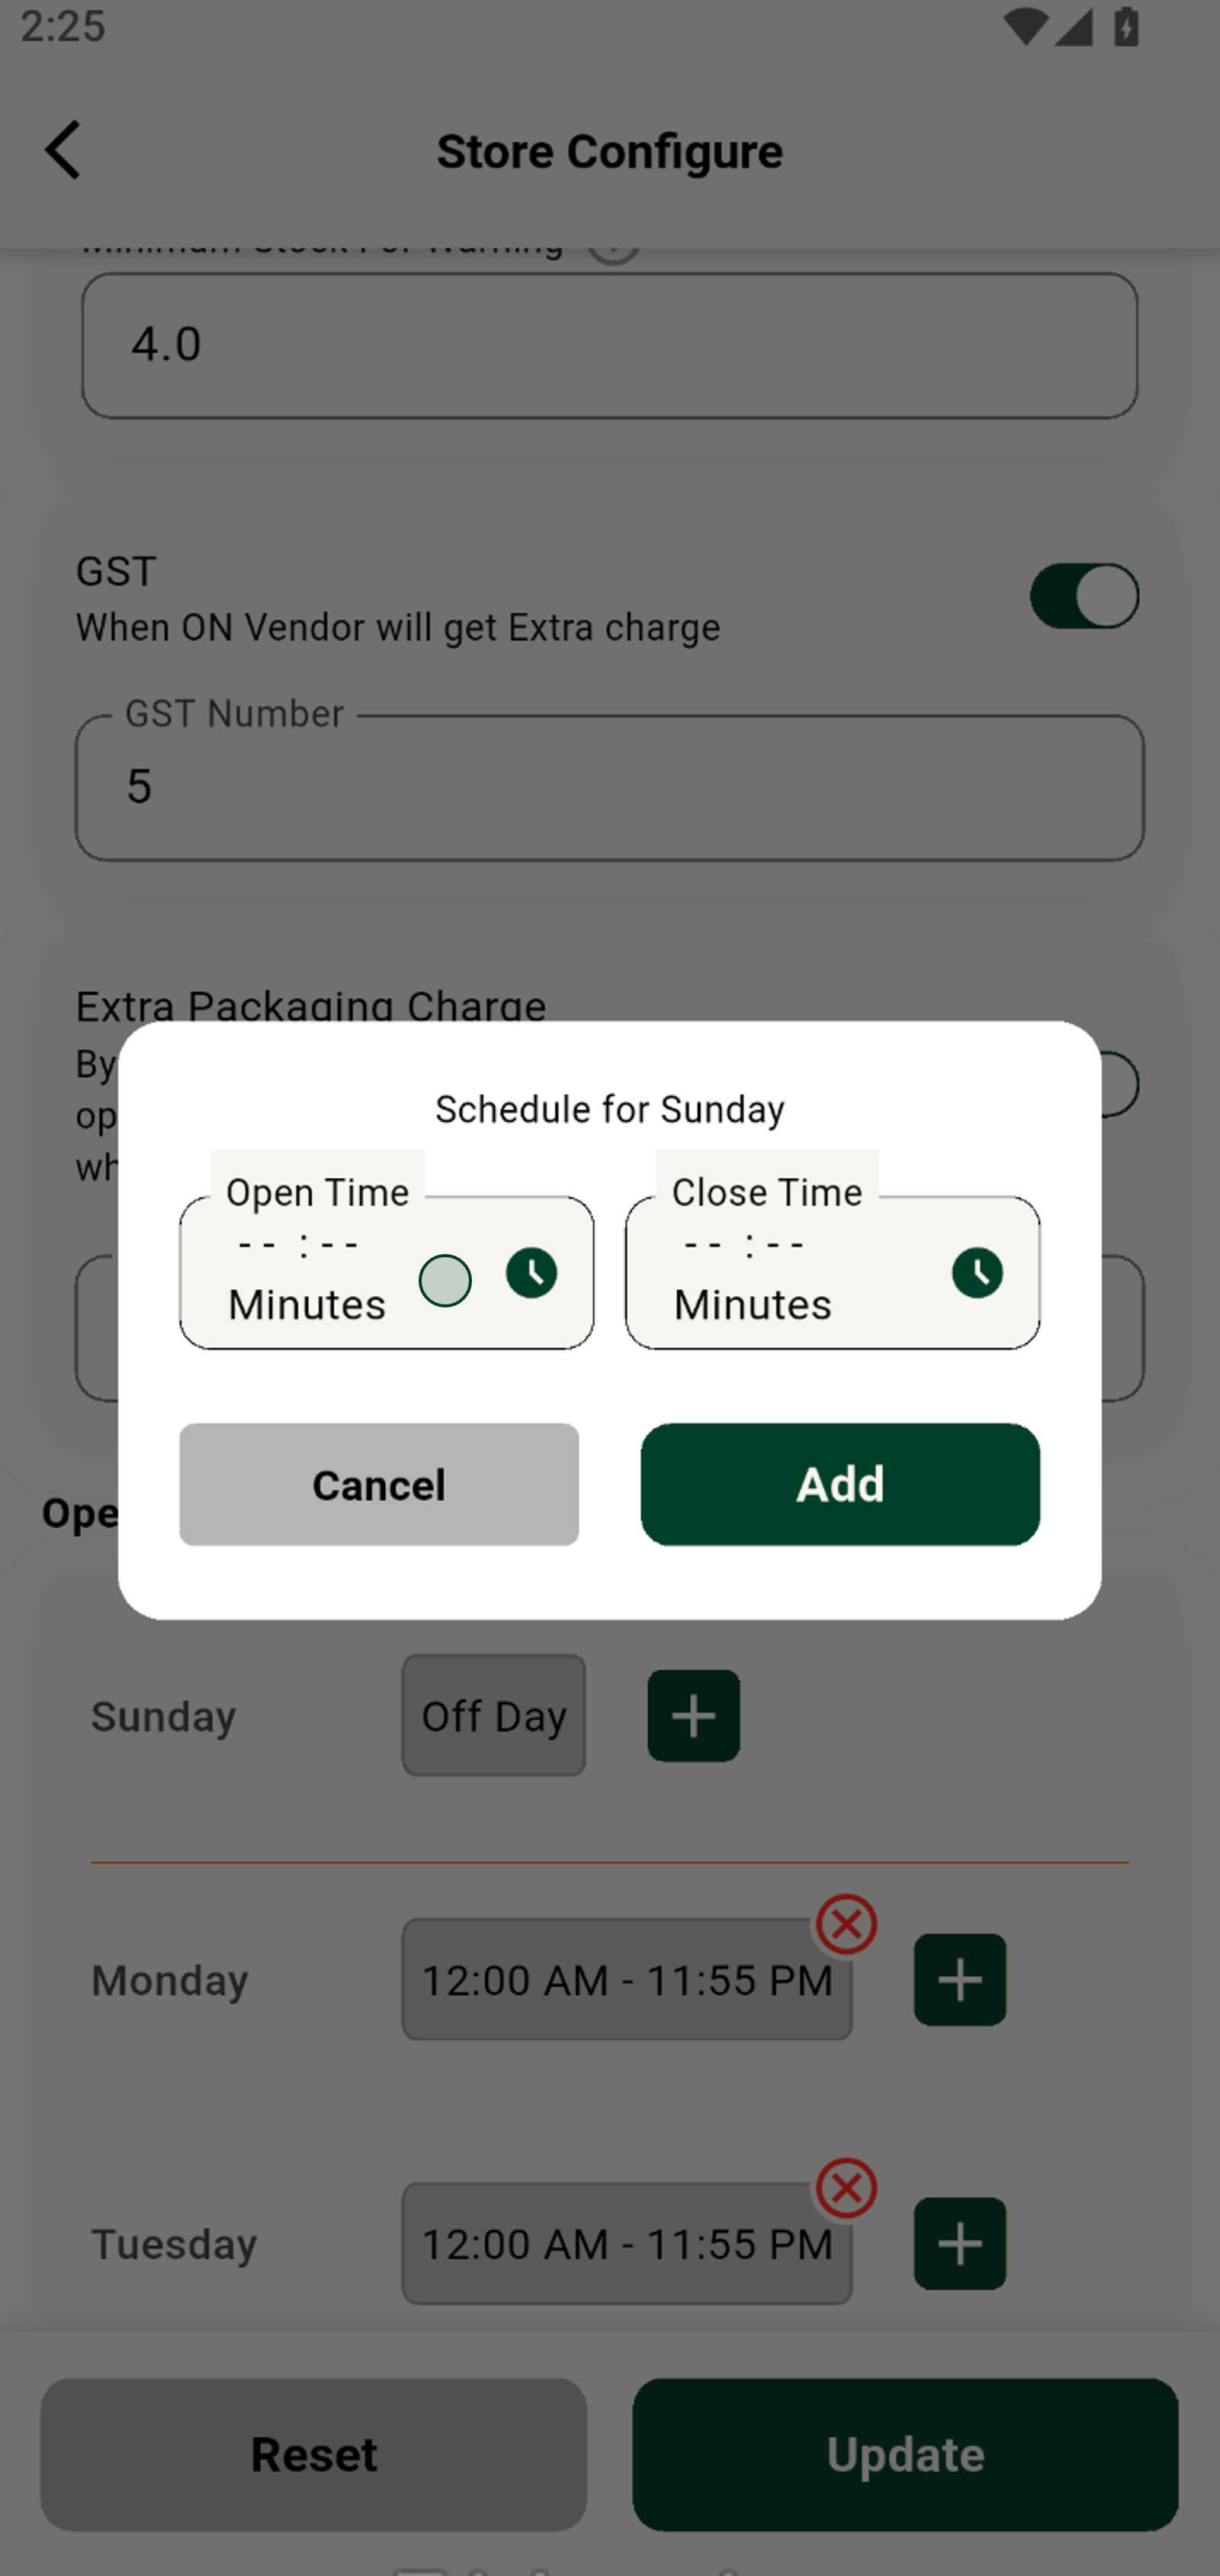
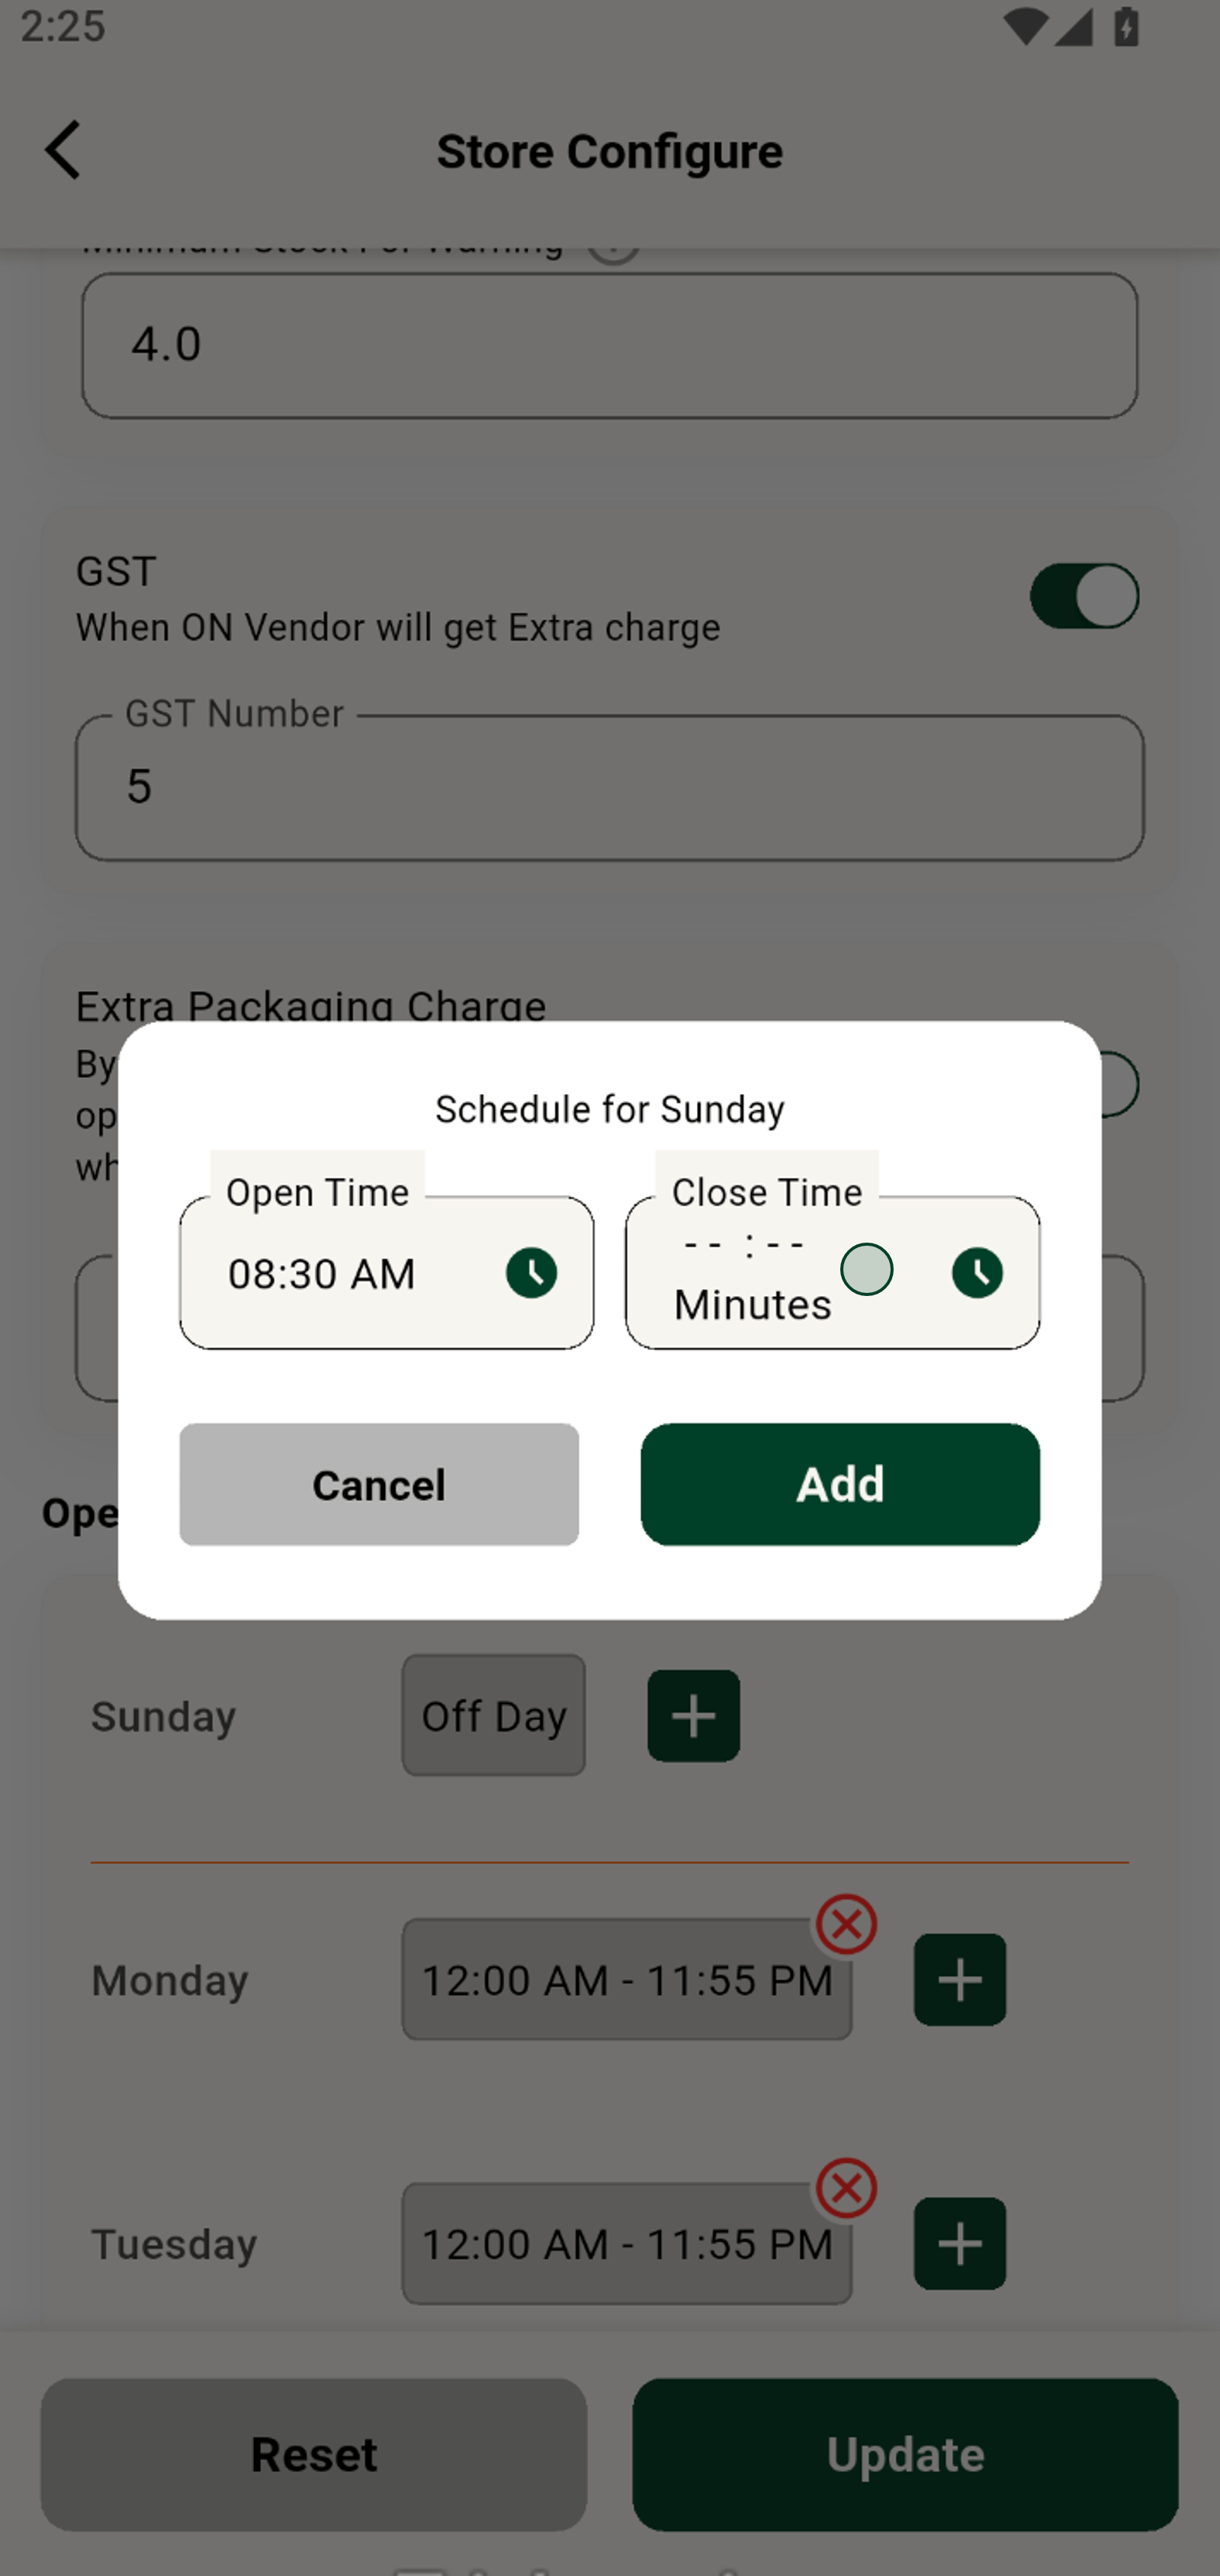
Add or adjust your operating hours to make sure your schedule matches your reality.
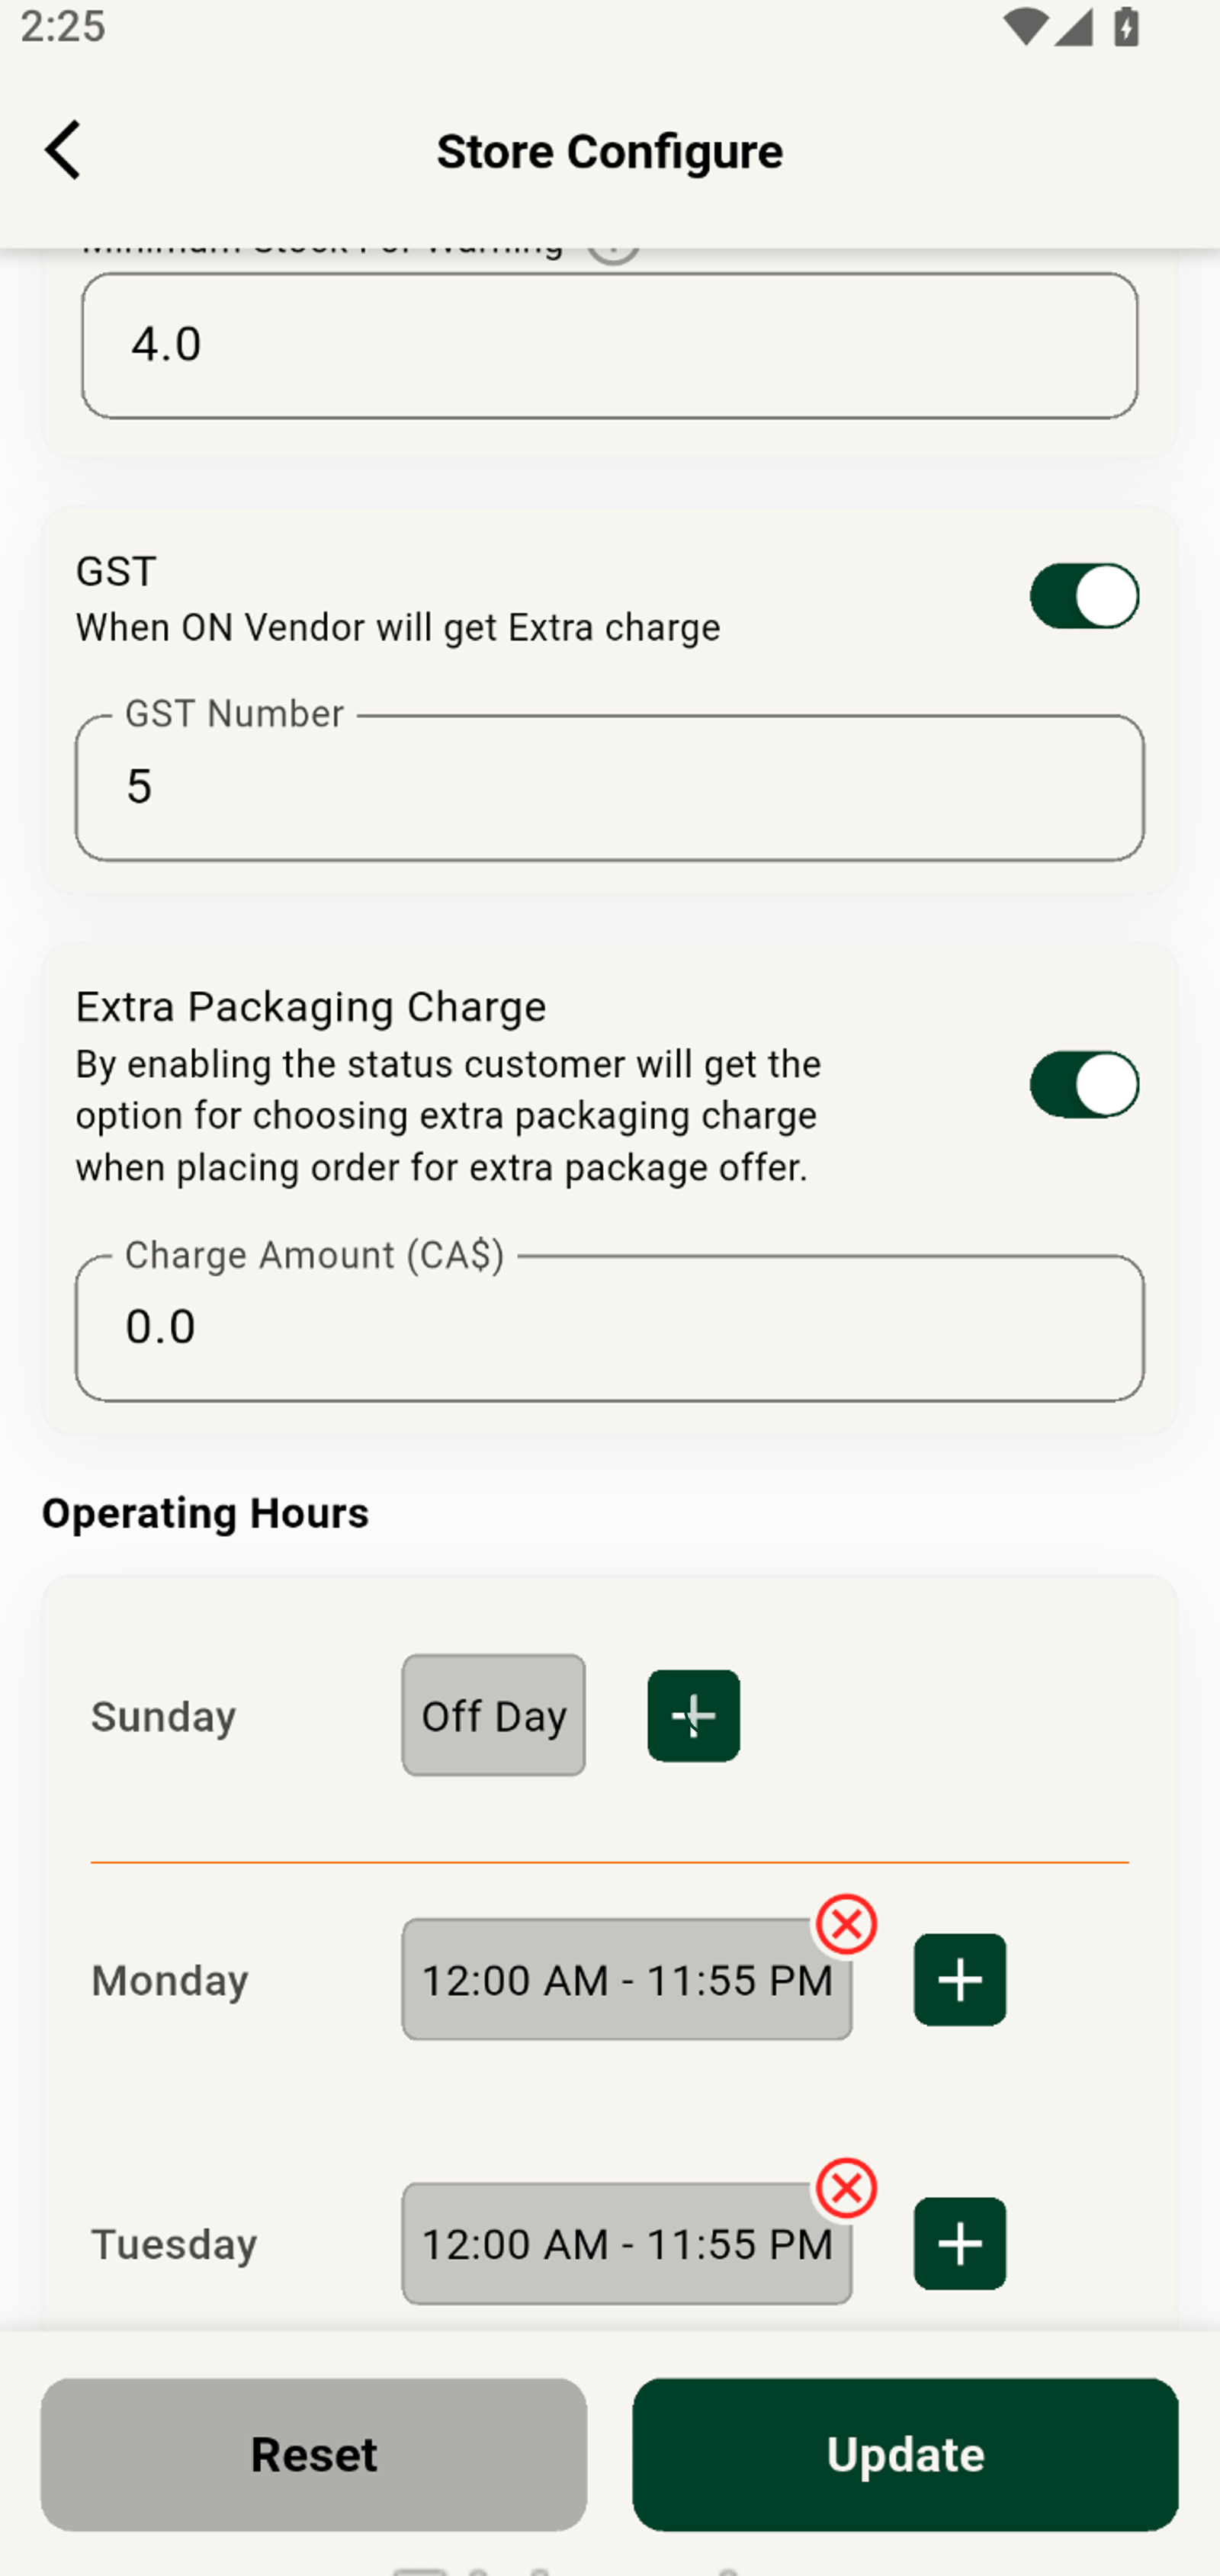
12. A confirmation message shows the store configuration is updated.
Click to set your store's opening time, tailoring your weekly schedule.
13. Return to the store list to view updated information.
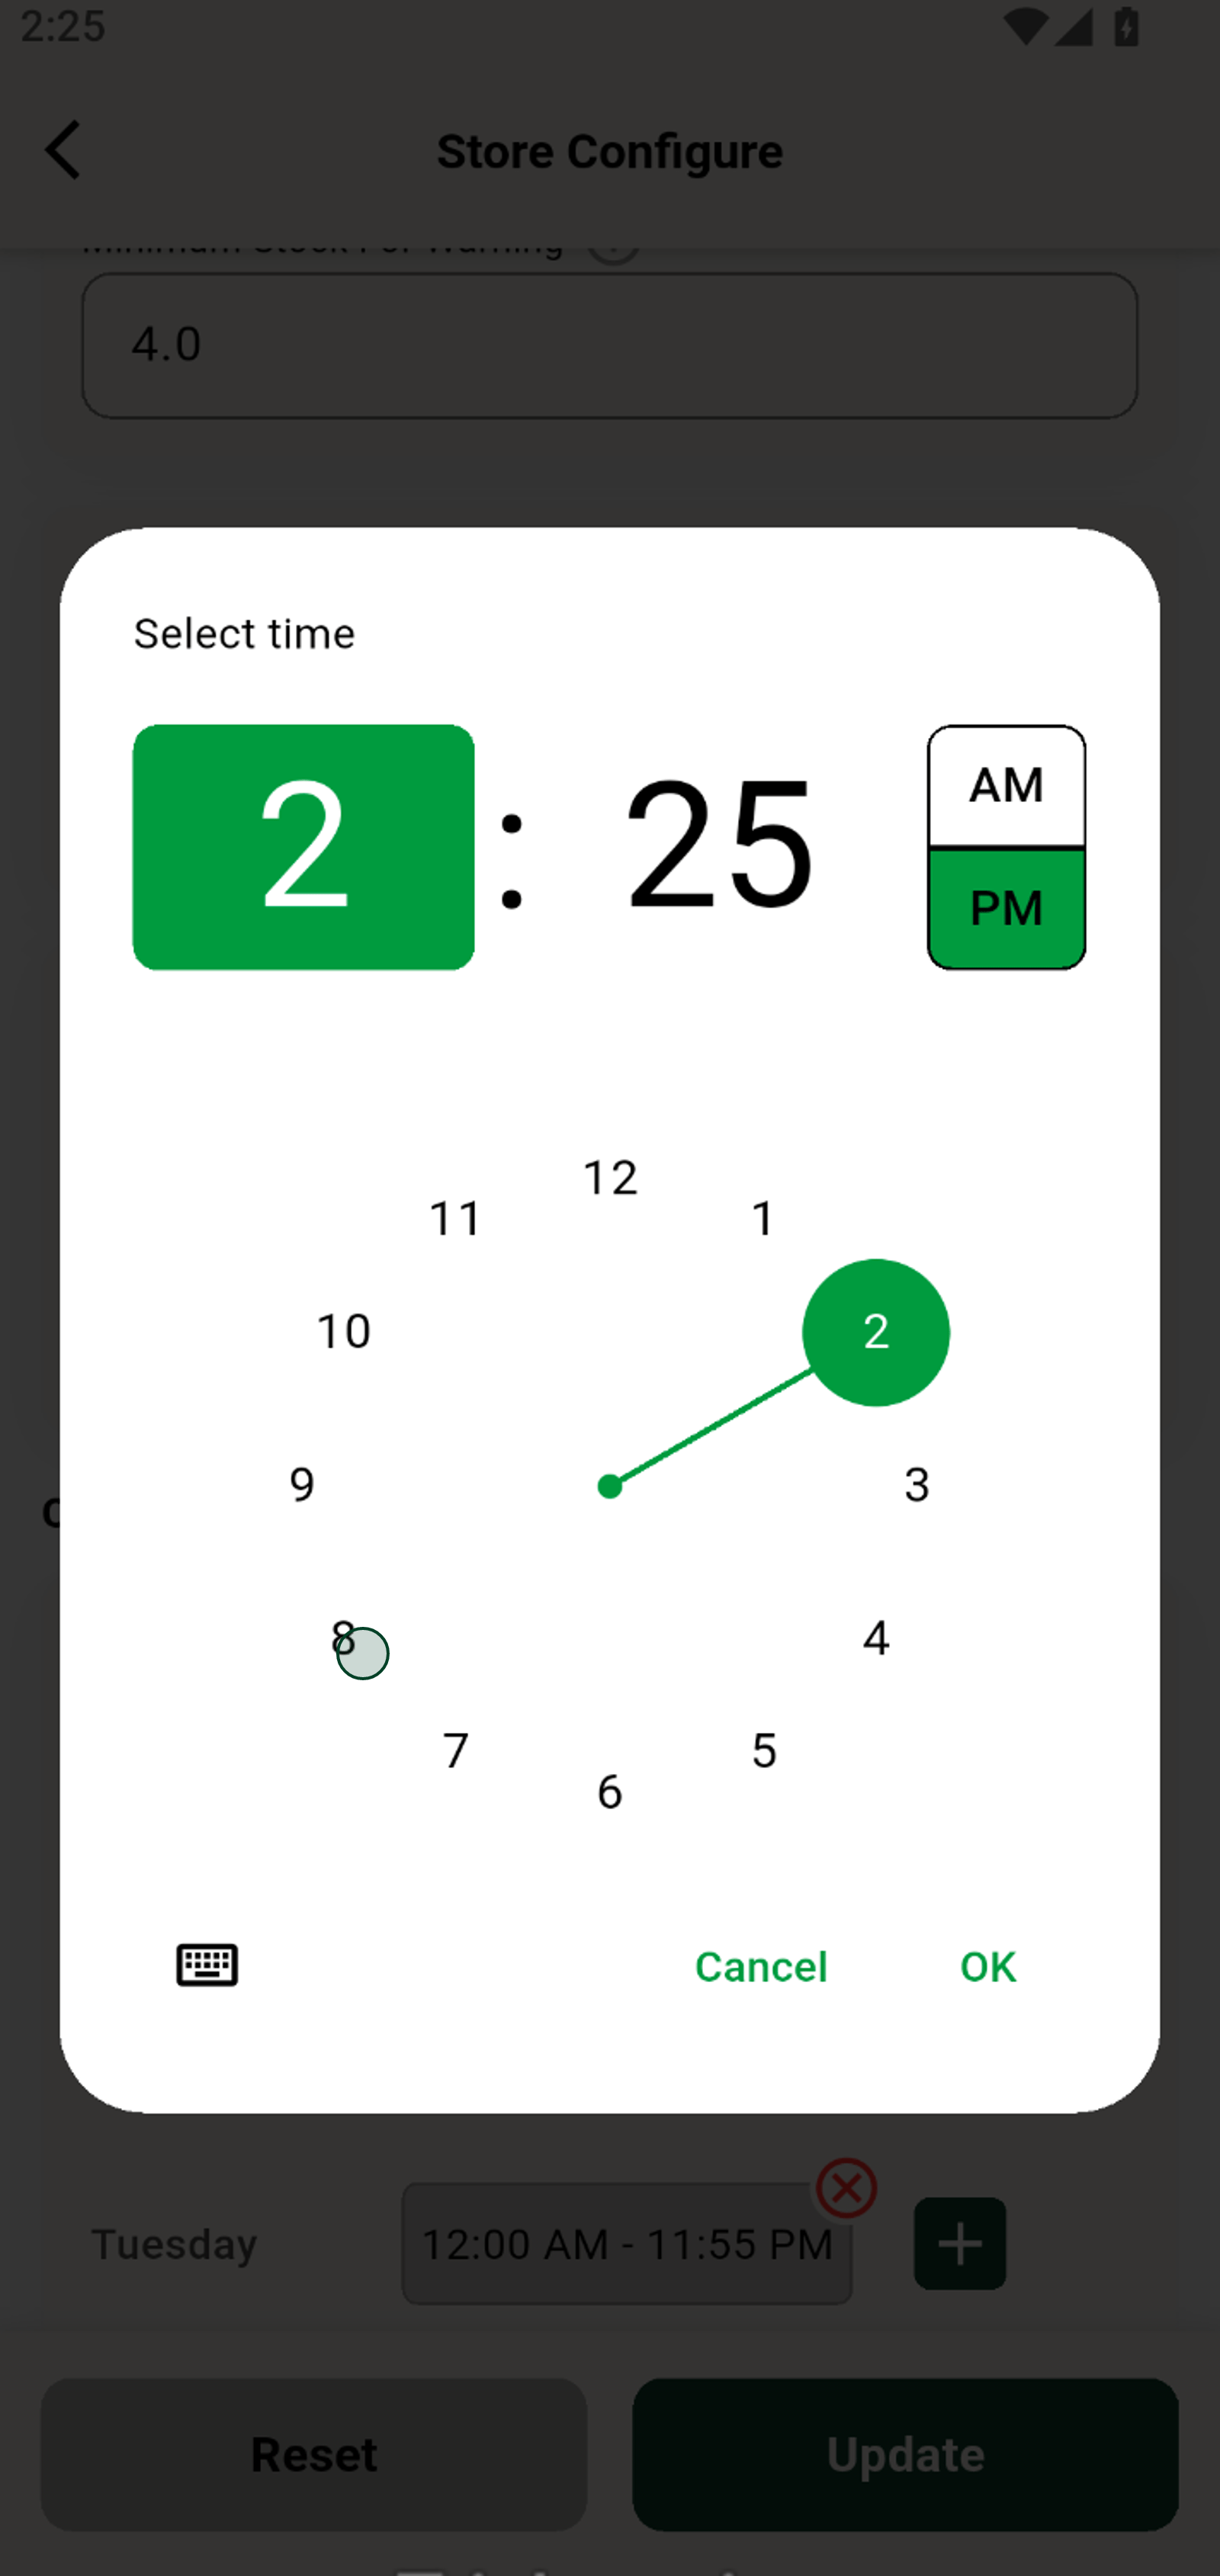
Pick the hour your store opens to suit your local demand.
14. Click the store name to review updated configuration details.
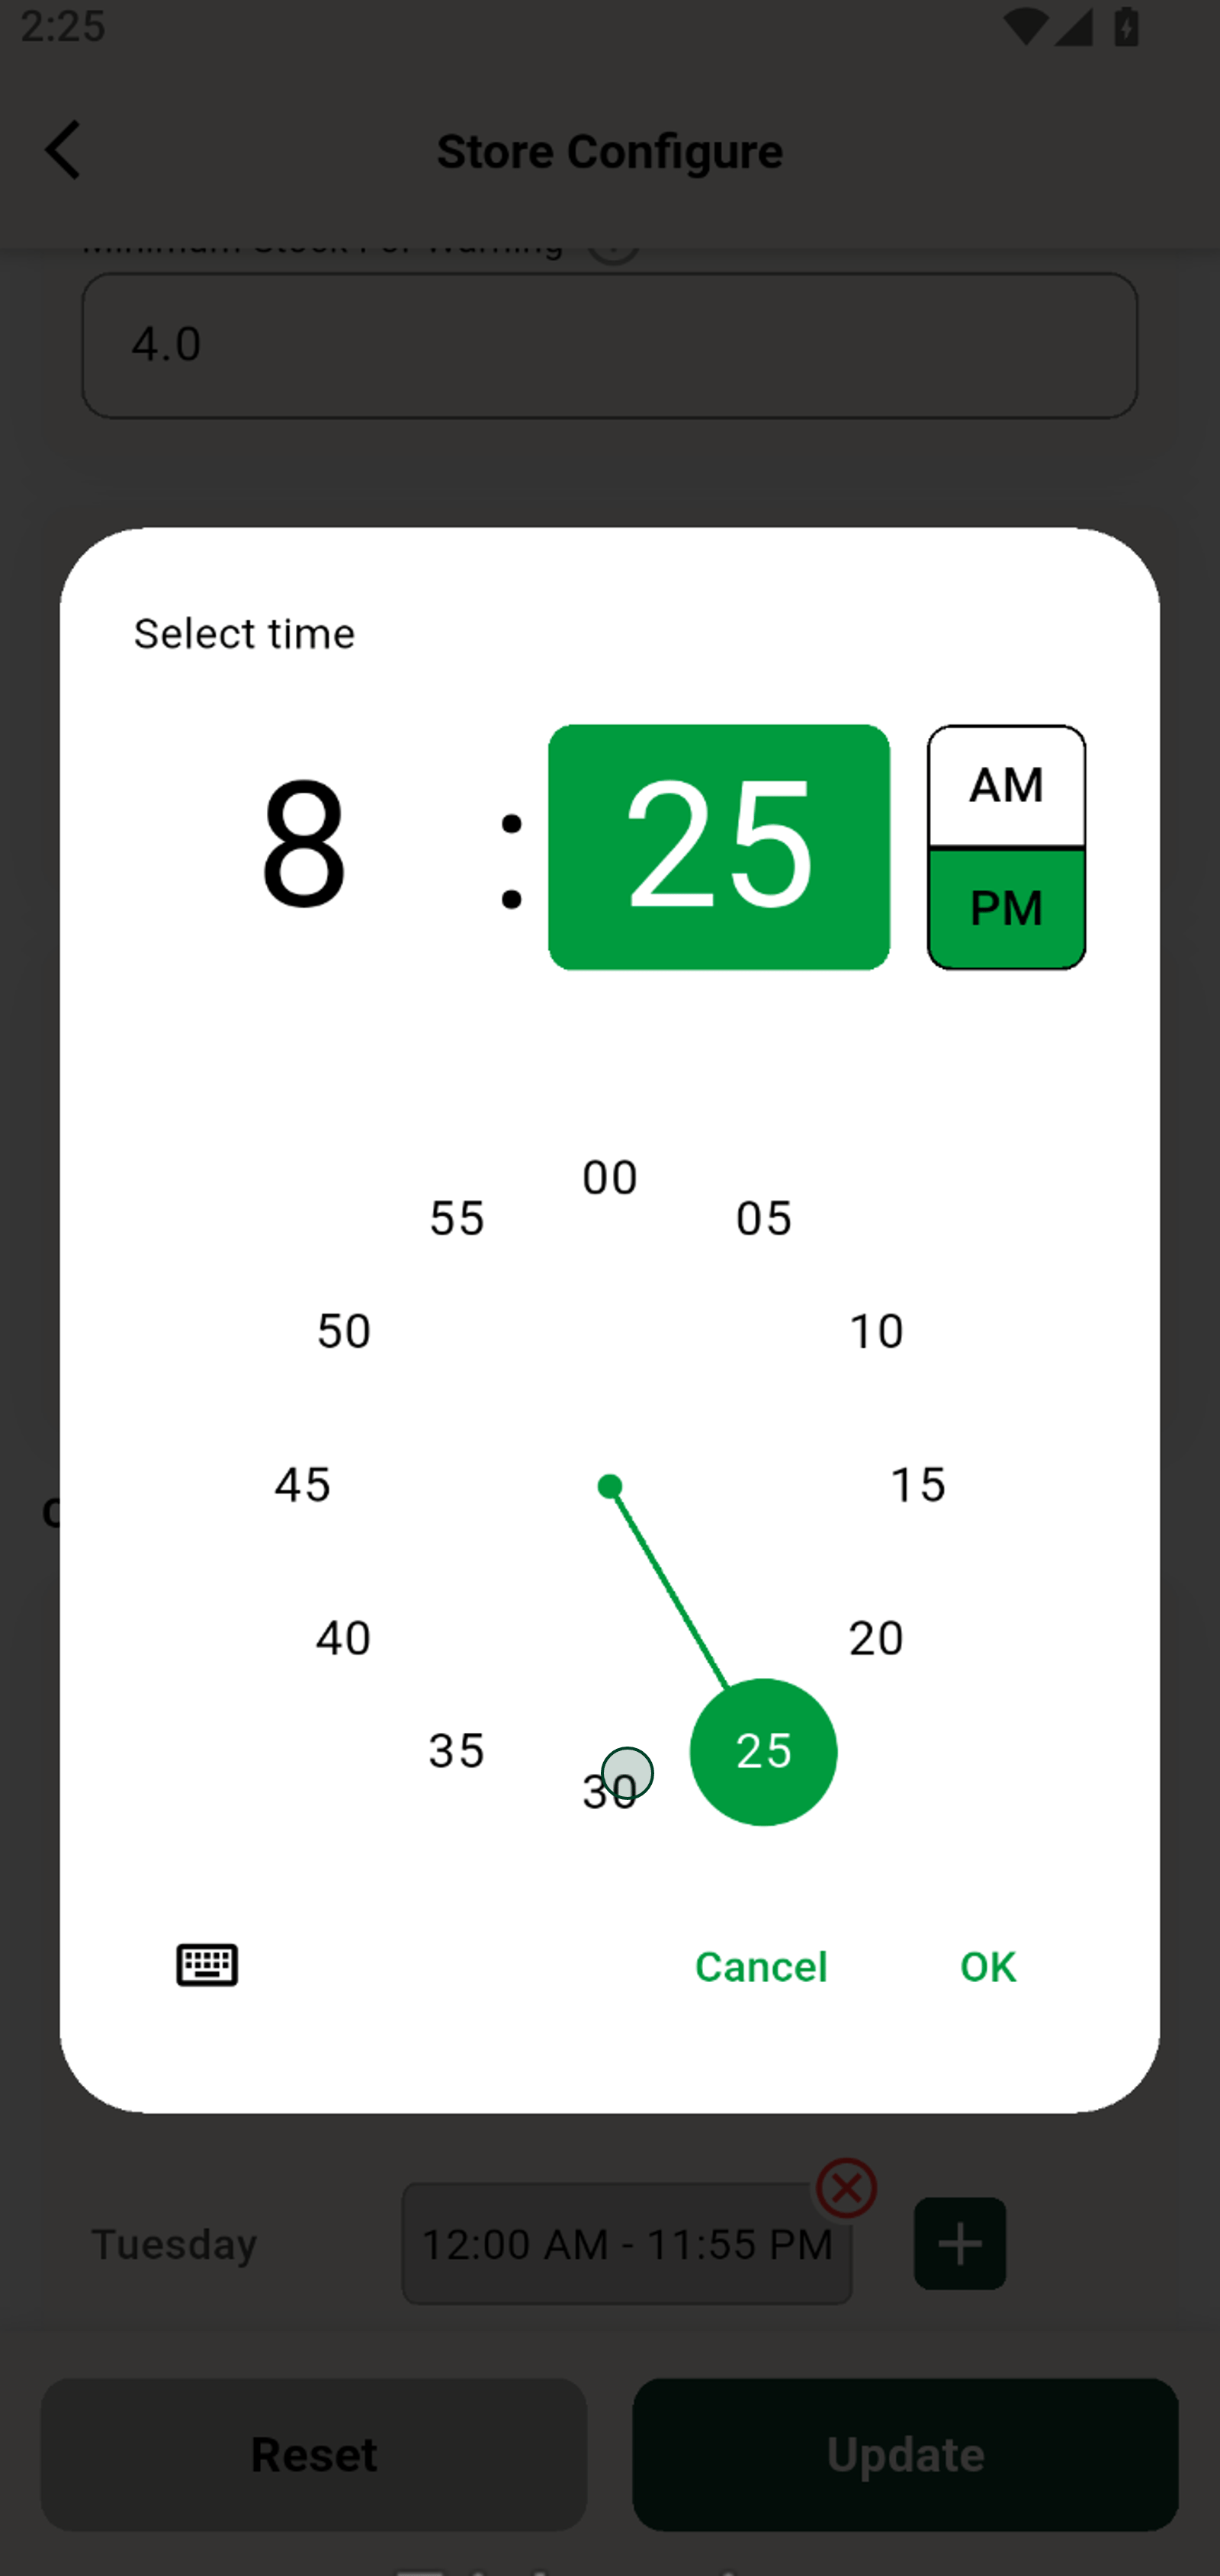
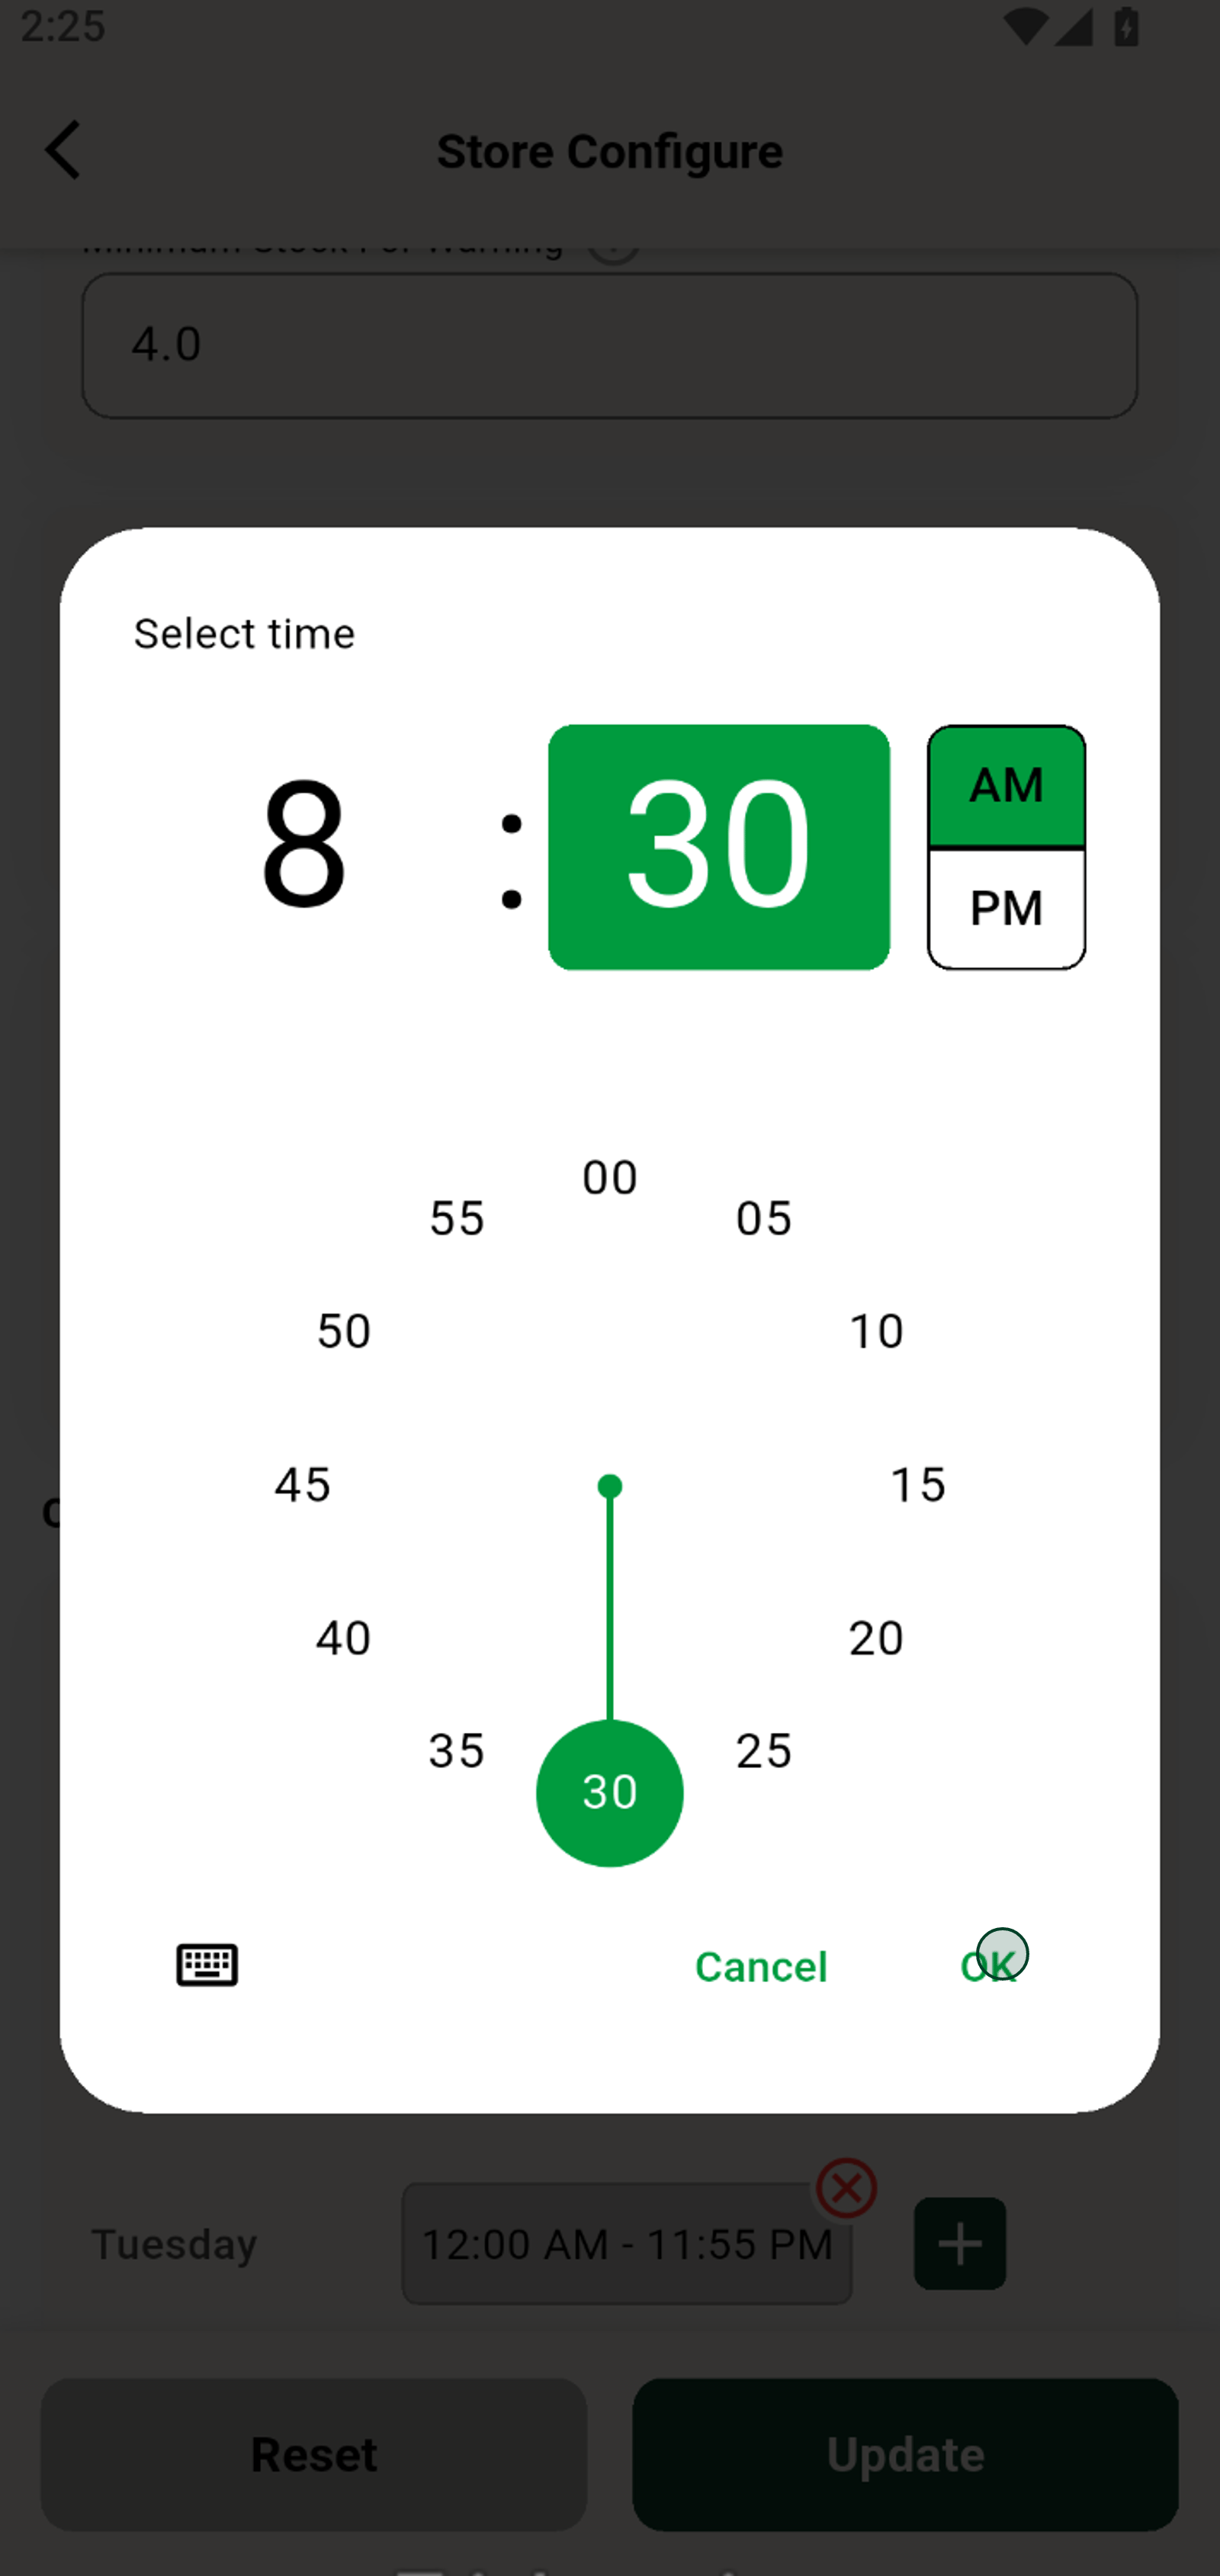
Select your opening minute for exact timing precision.
15. Scroll through the details to verify all updates are correct.
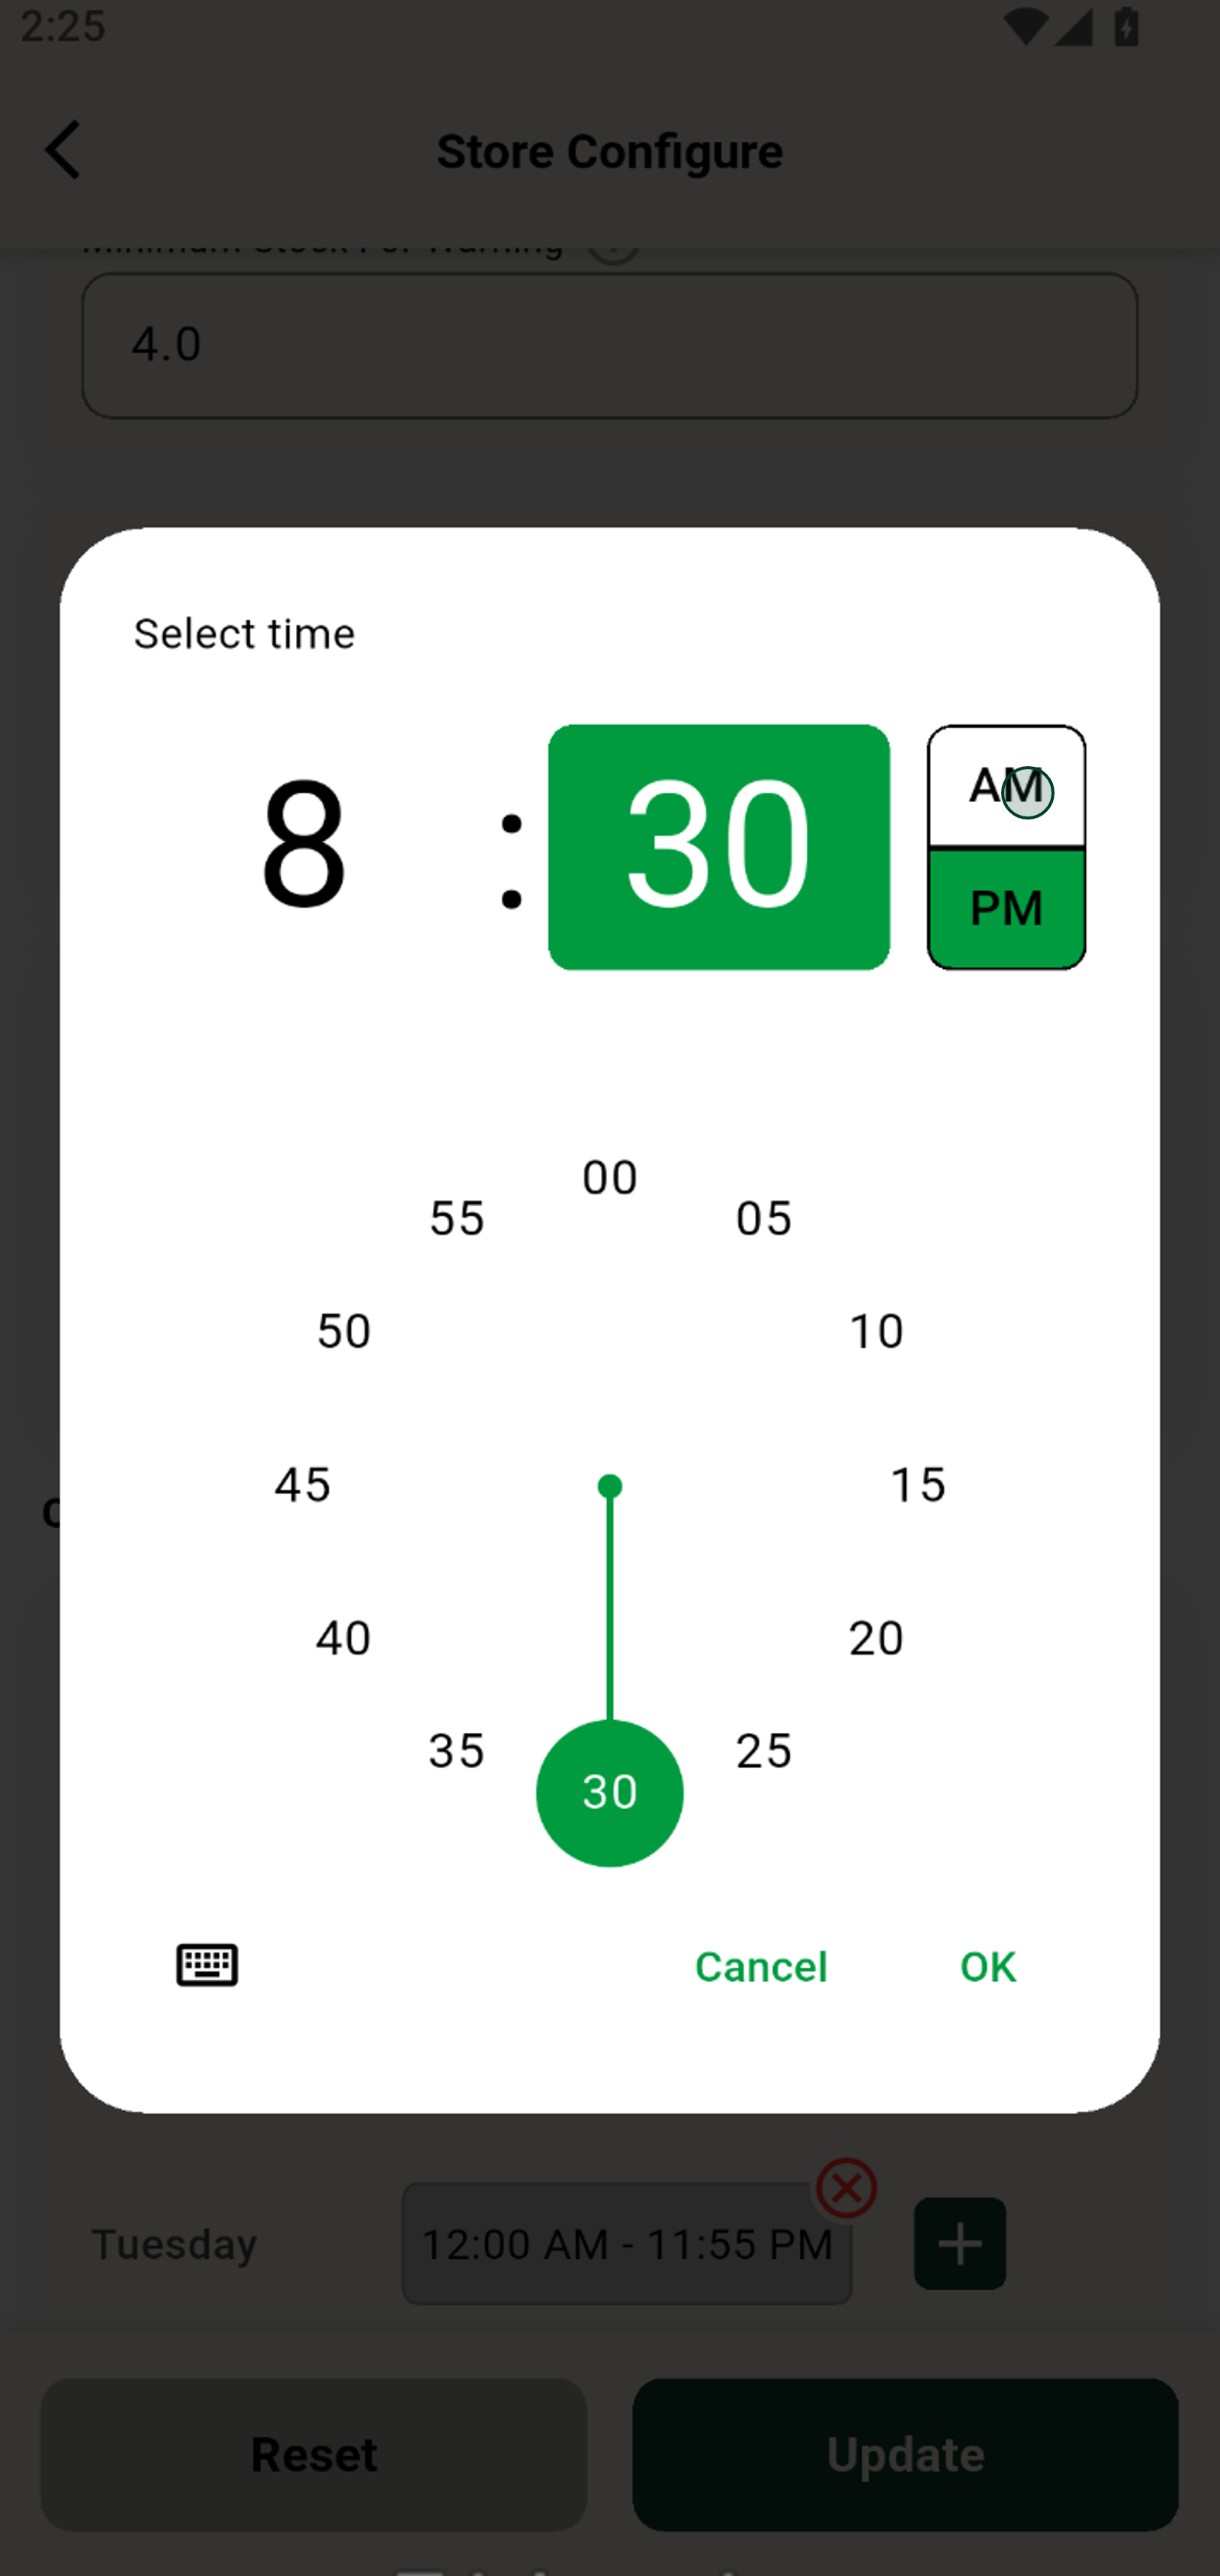
Lock in AM or PM to make your opening time crystal clear.
16. Use the 'Edit' option if further changes are needed.
Confirm your selected opening time for a seamless experience.
17. Return to main settings when finished reviewing the updates.
Now, set your closing time for the day with a quick tap.
18. Ensure all stores have accurate and current configurations.
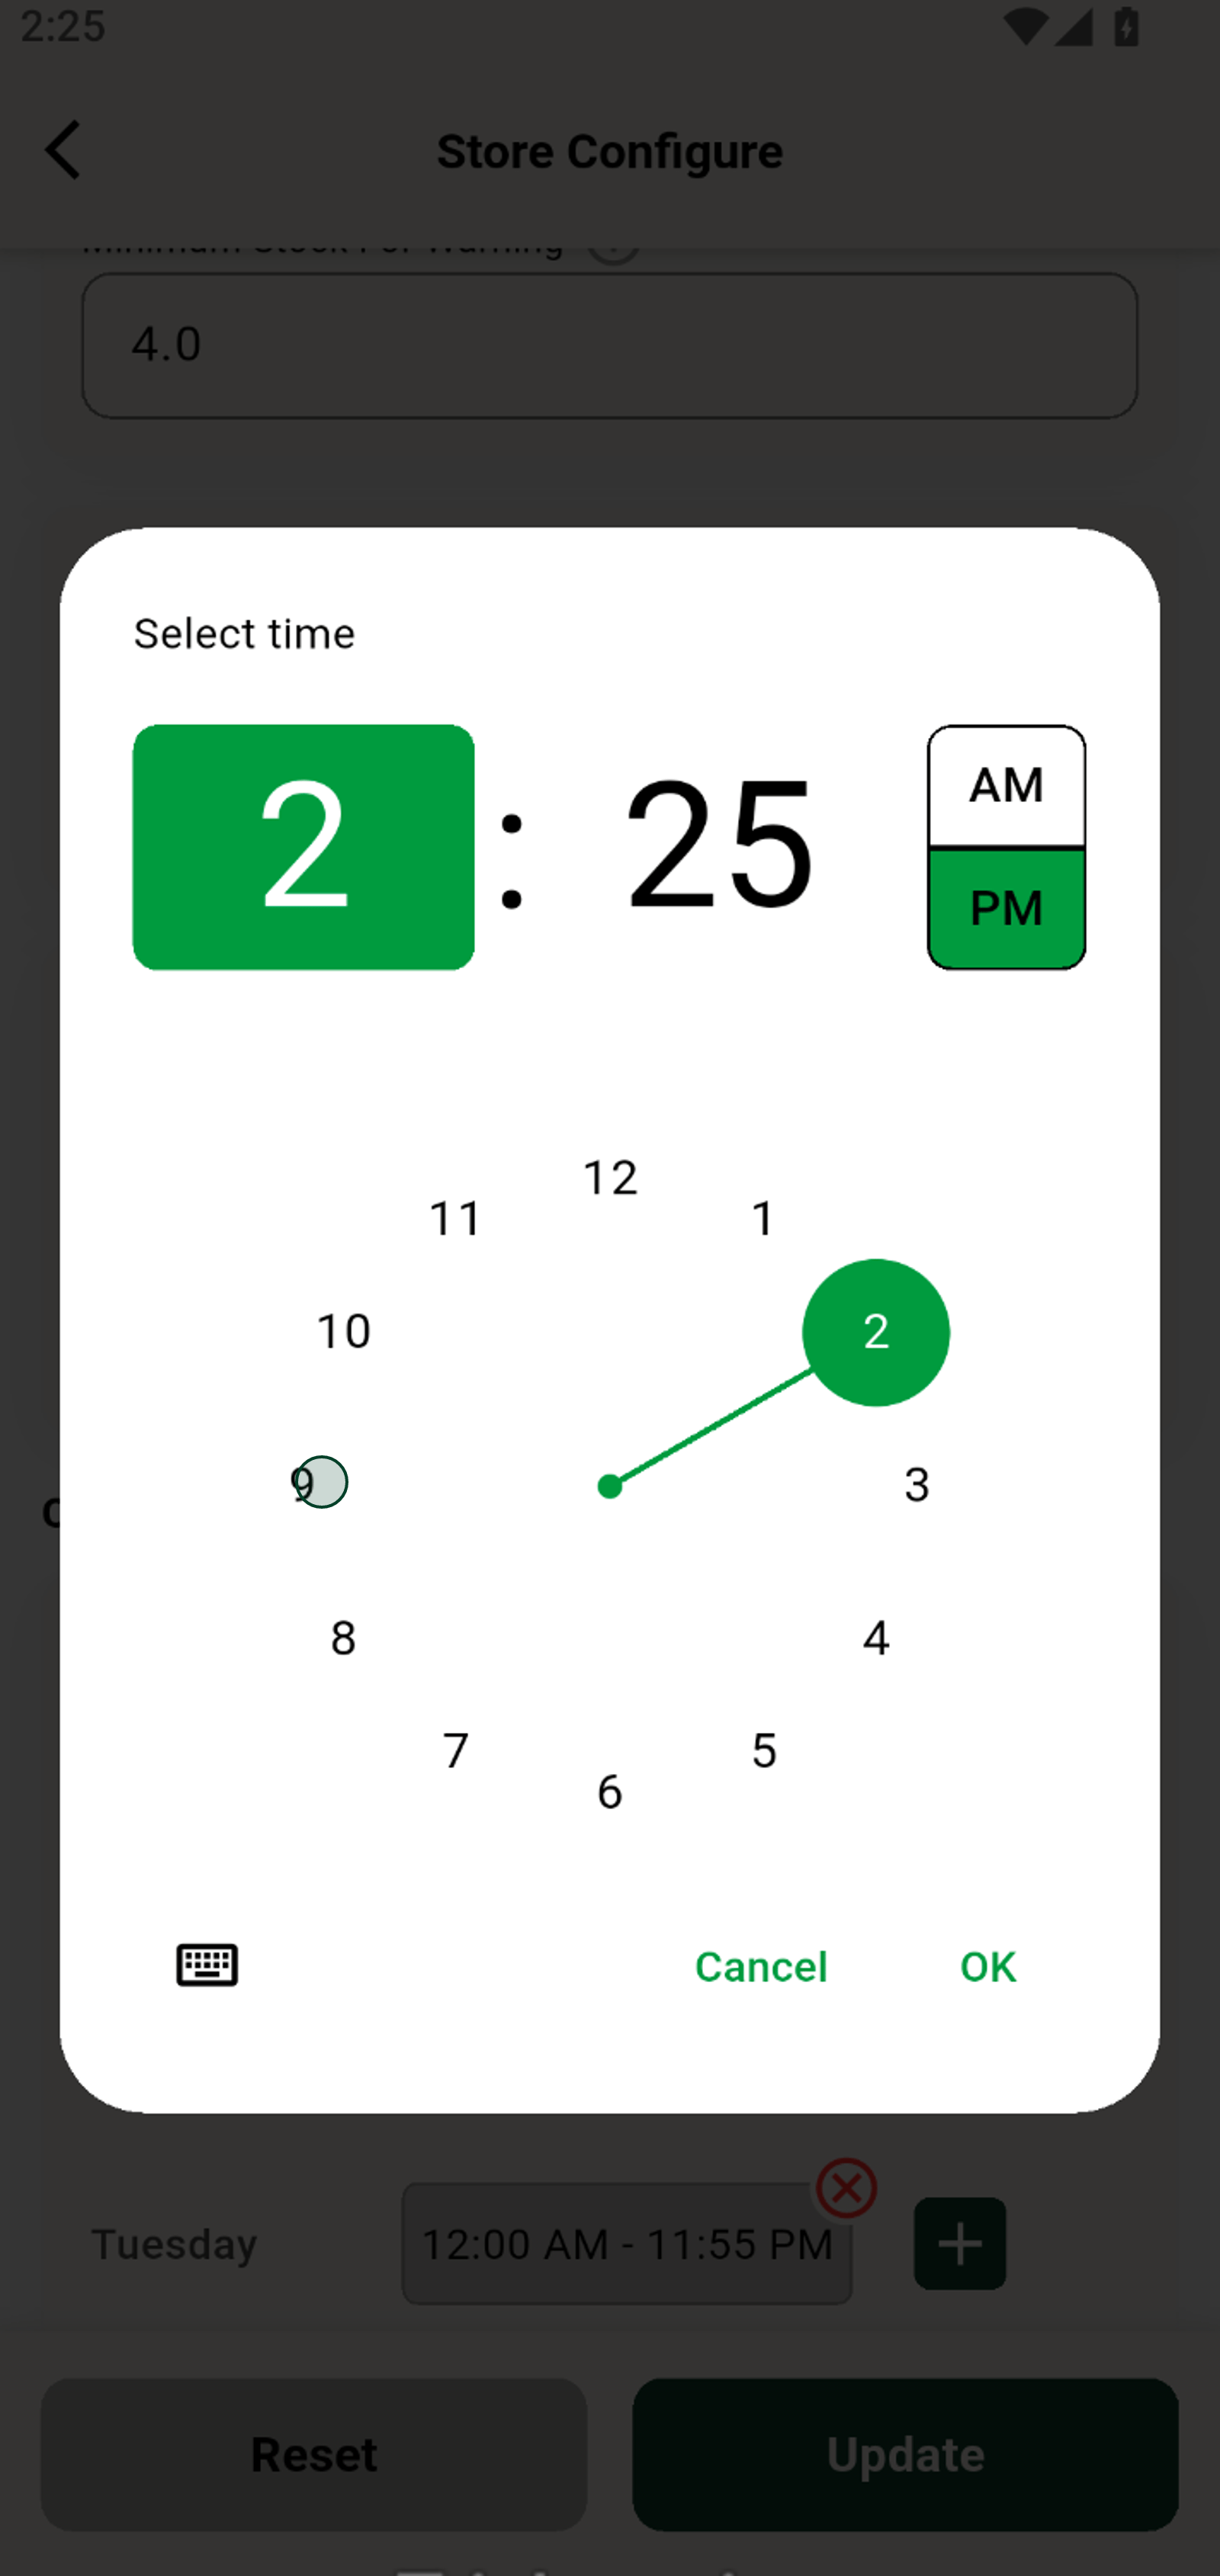
Choose your hour for the store's closing time.
19. Log out of the admin dashboard to secure your changes.
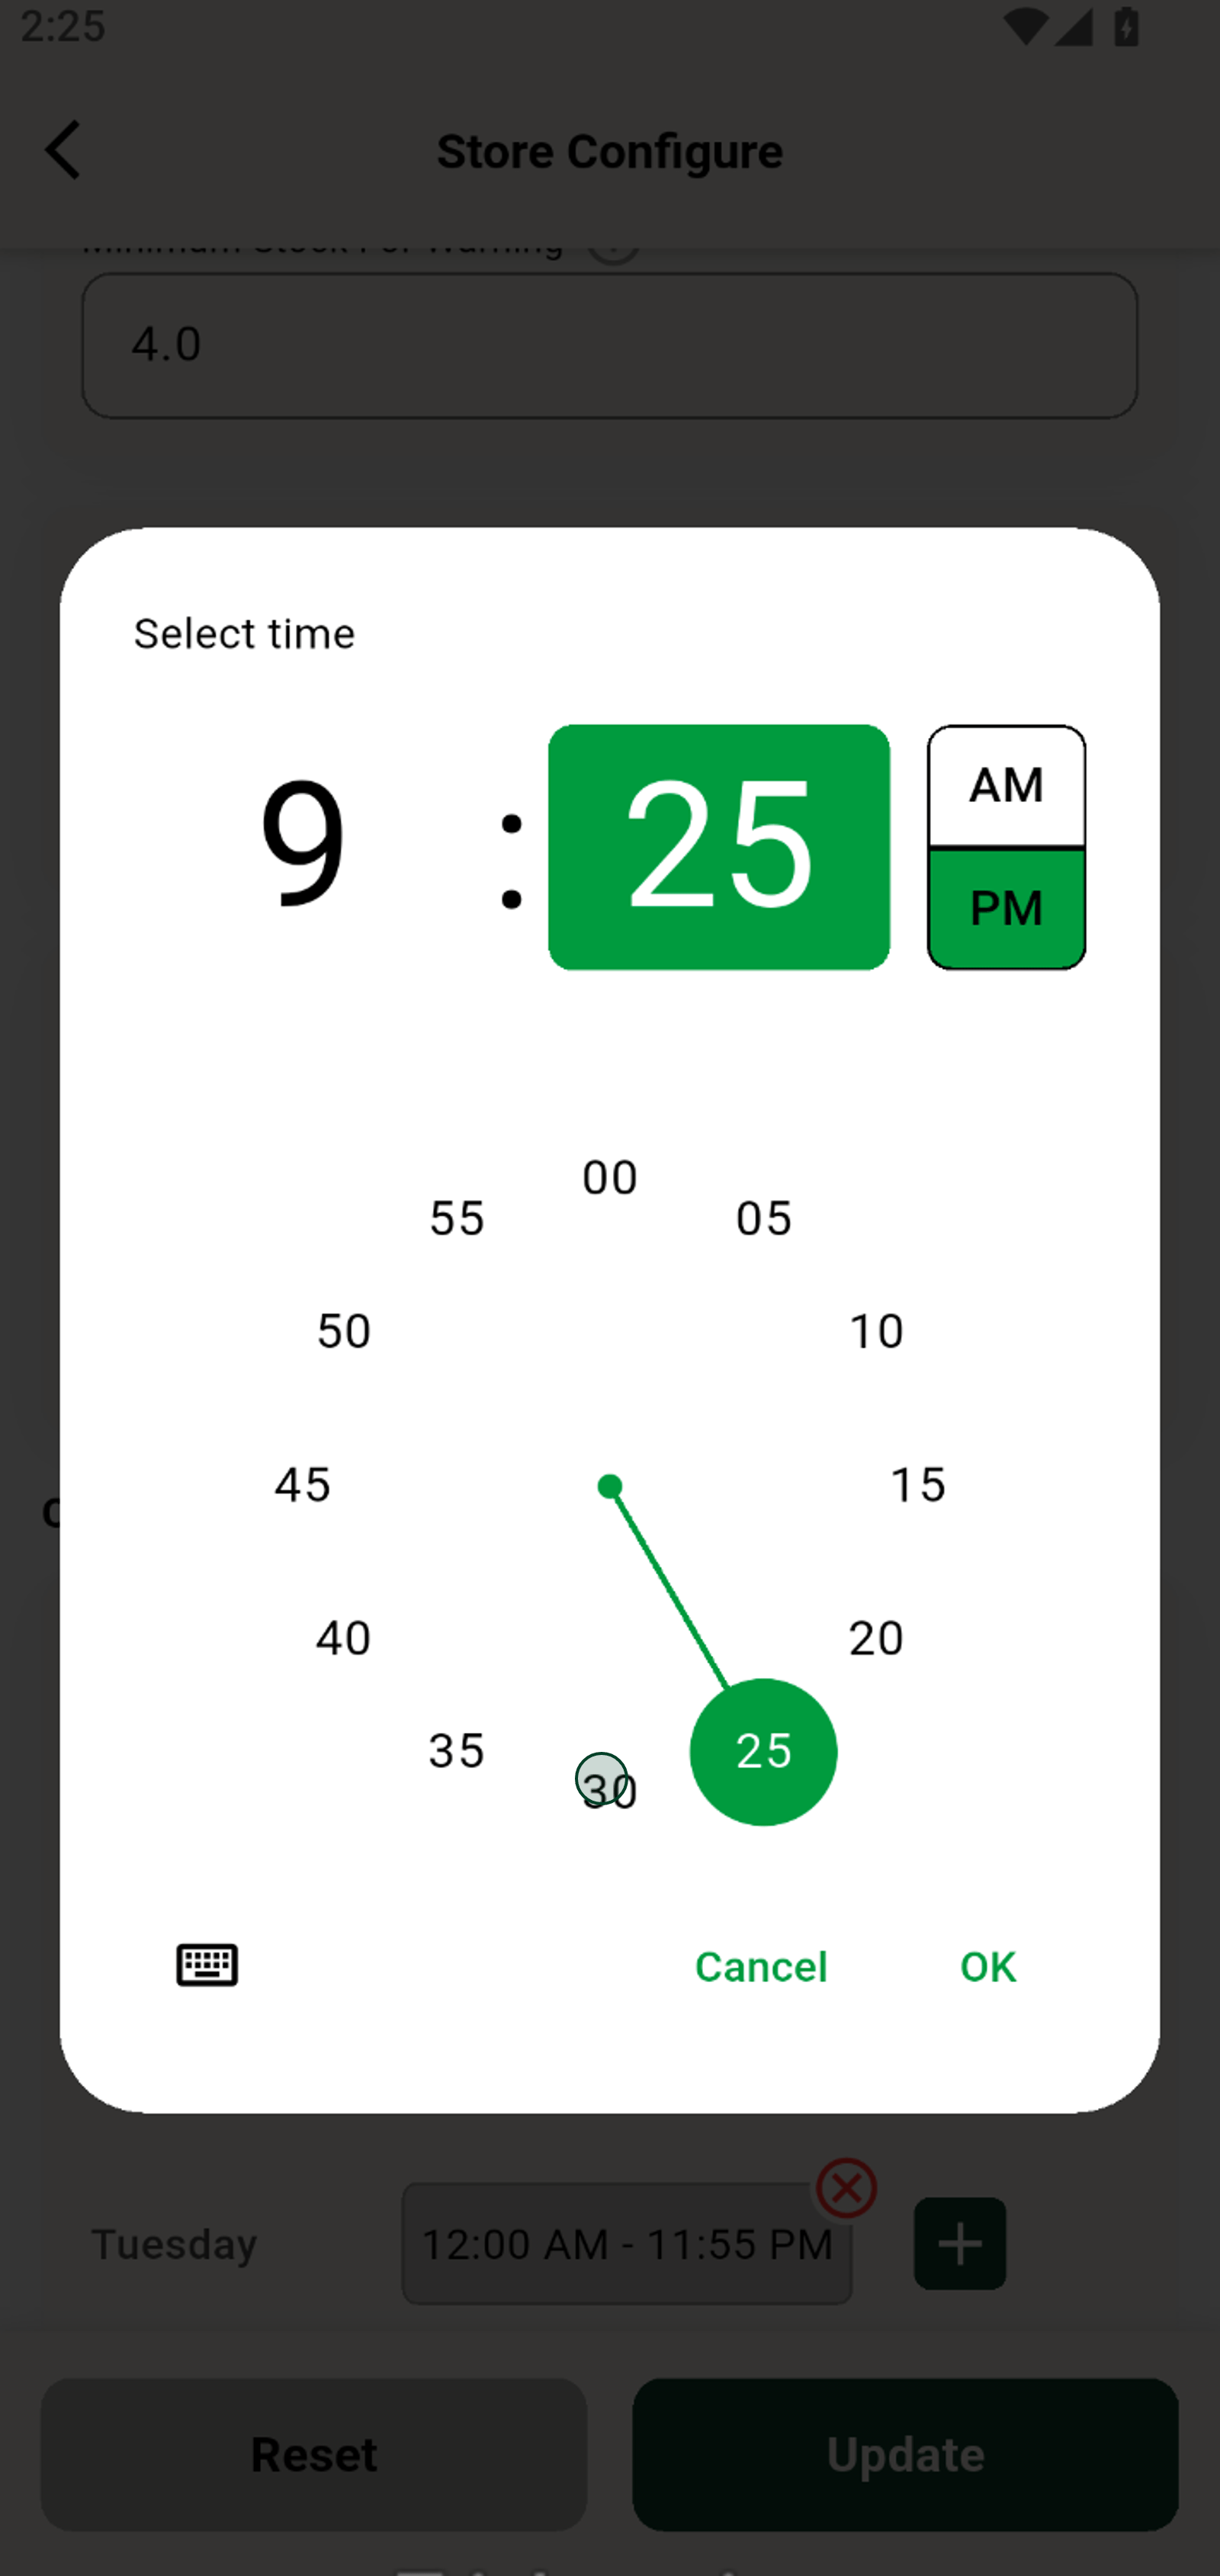
Adjust your closing minutes for precise schedule control.
20. You have successfully updated the store configuration.
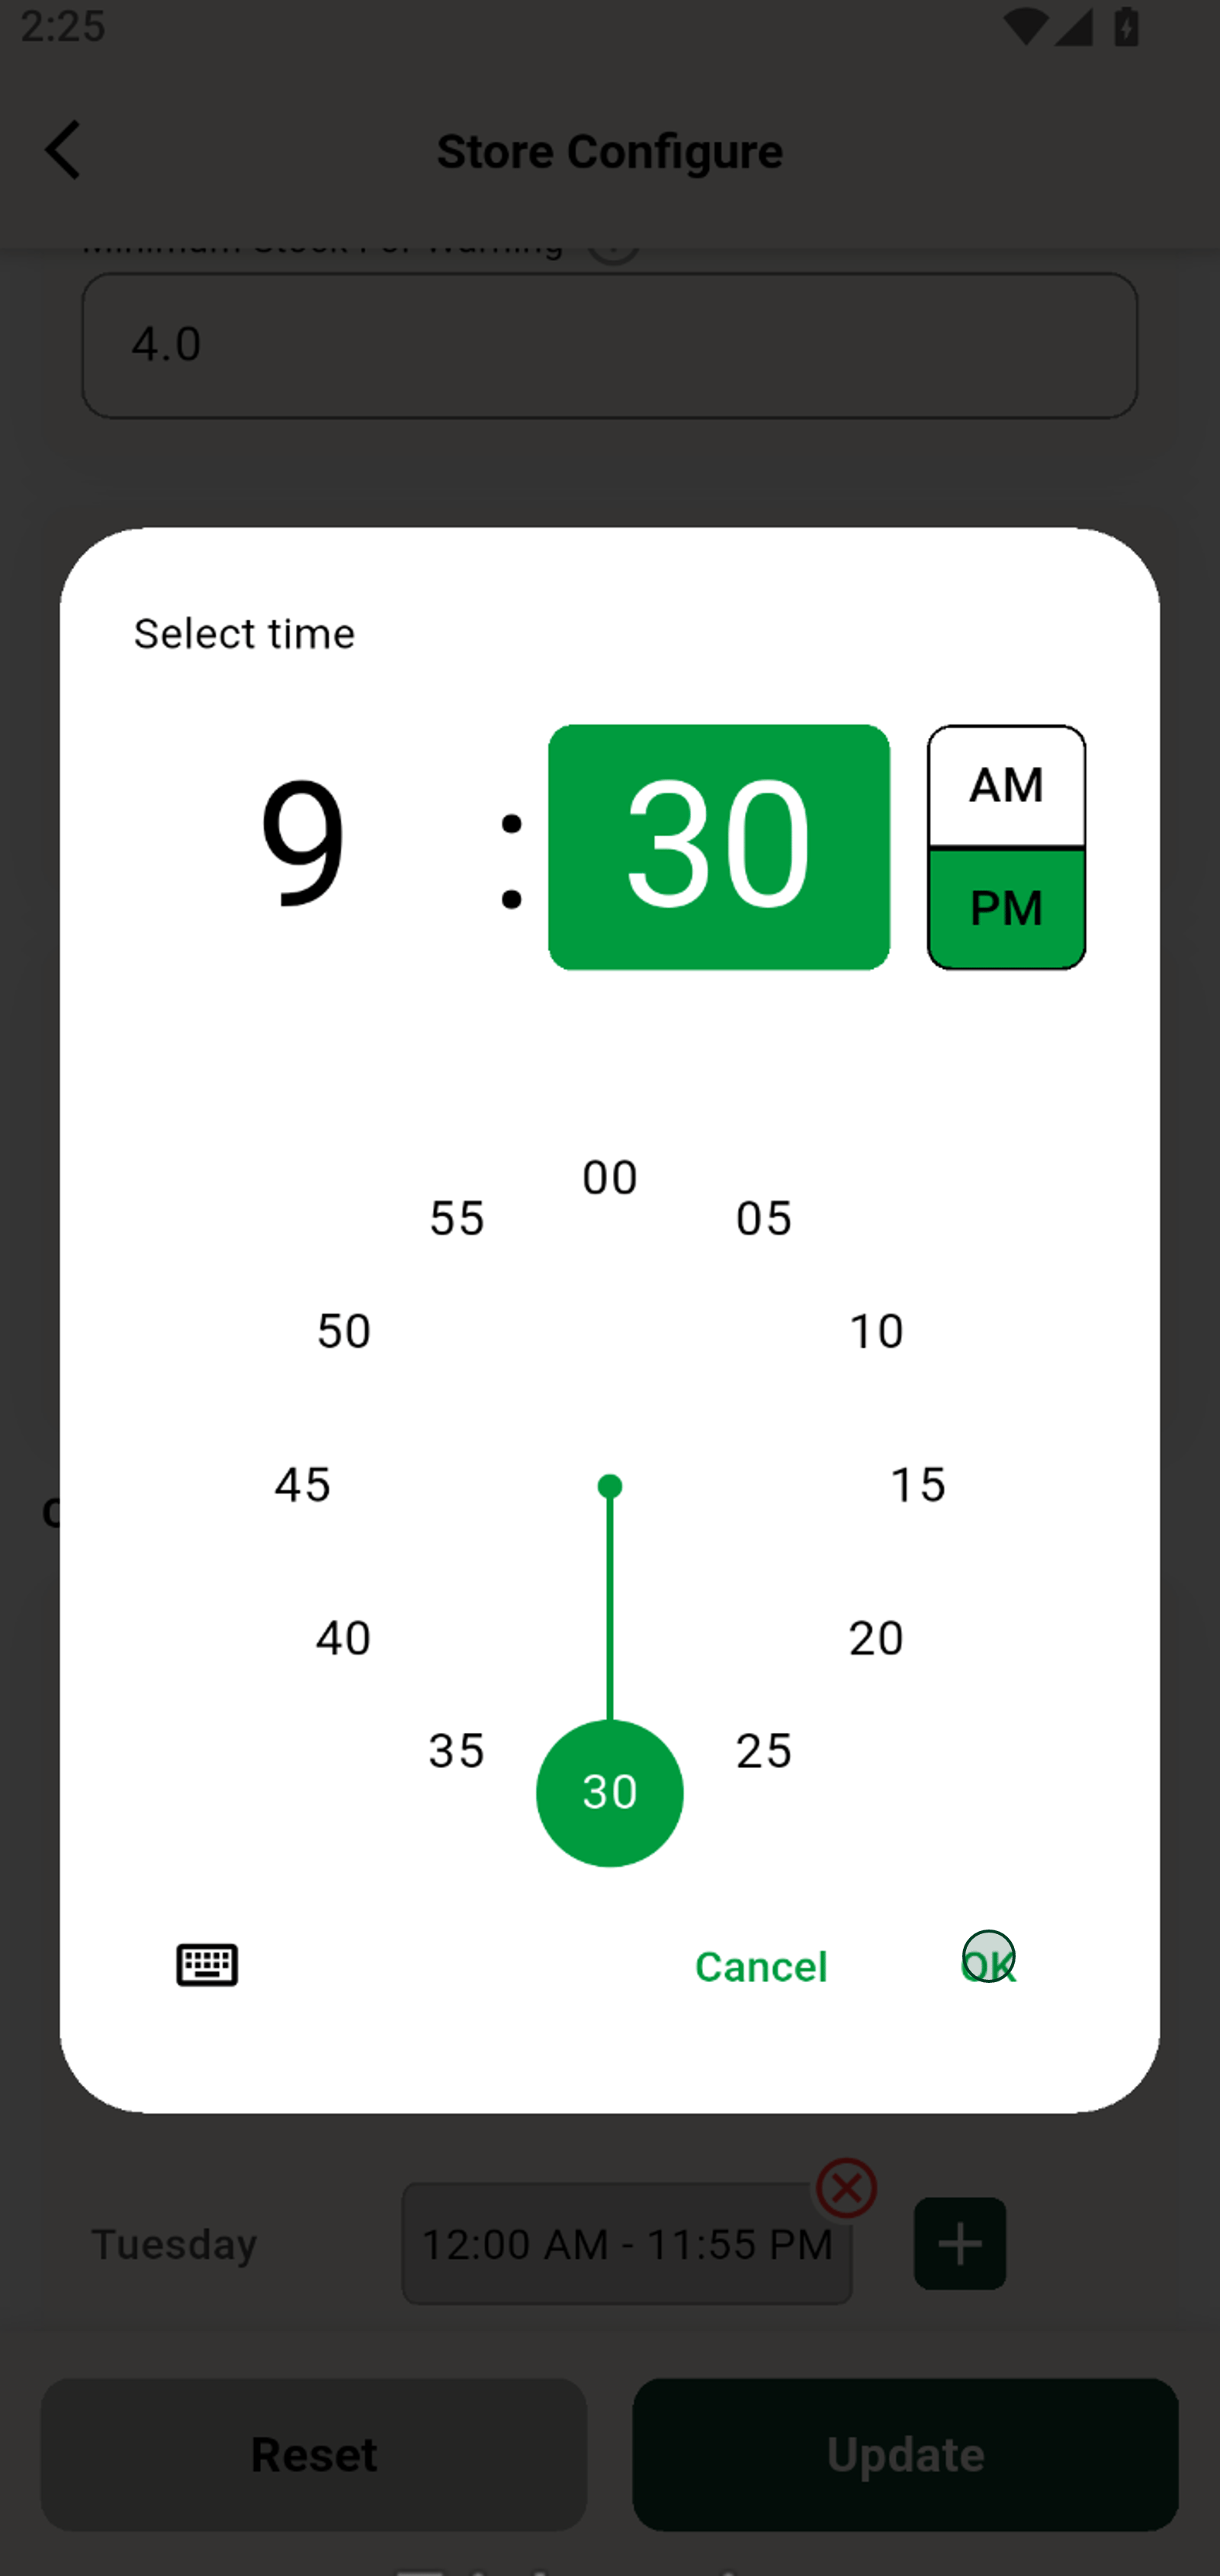
Click OK to lock in your closing time setting.
21. For future updates, repeat these steps as necessary.
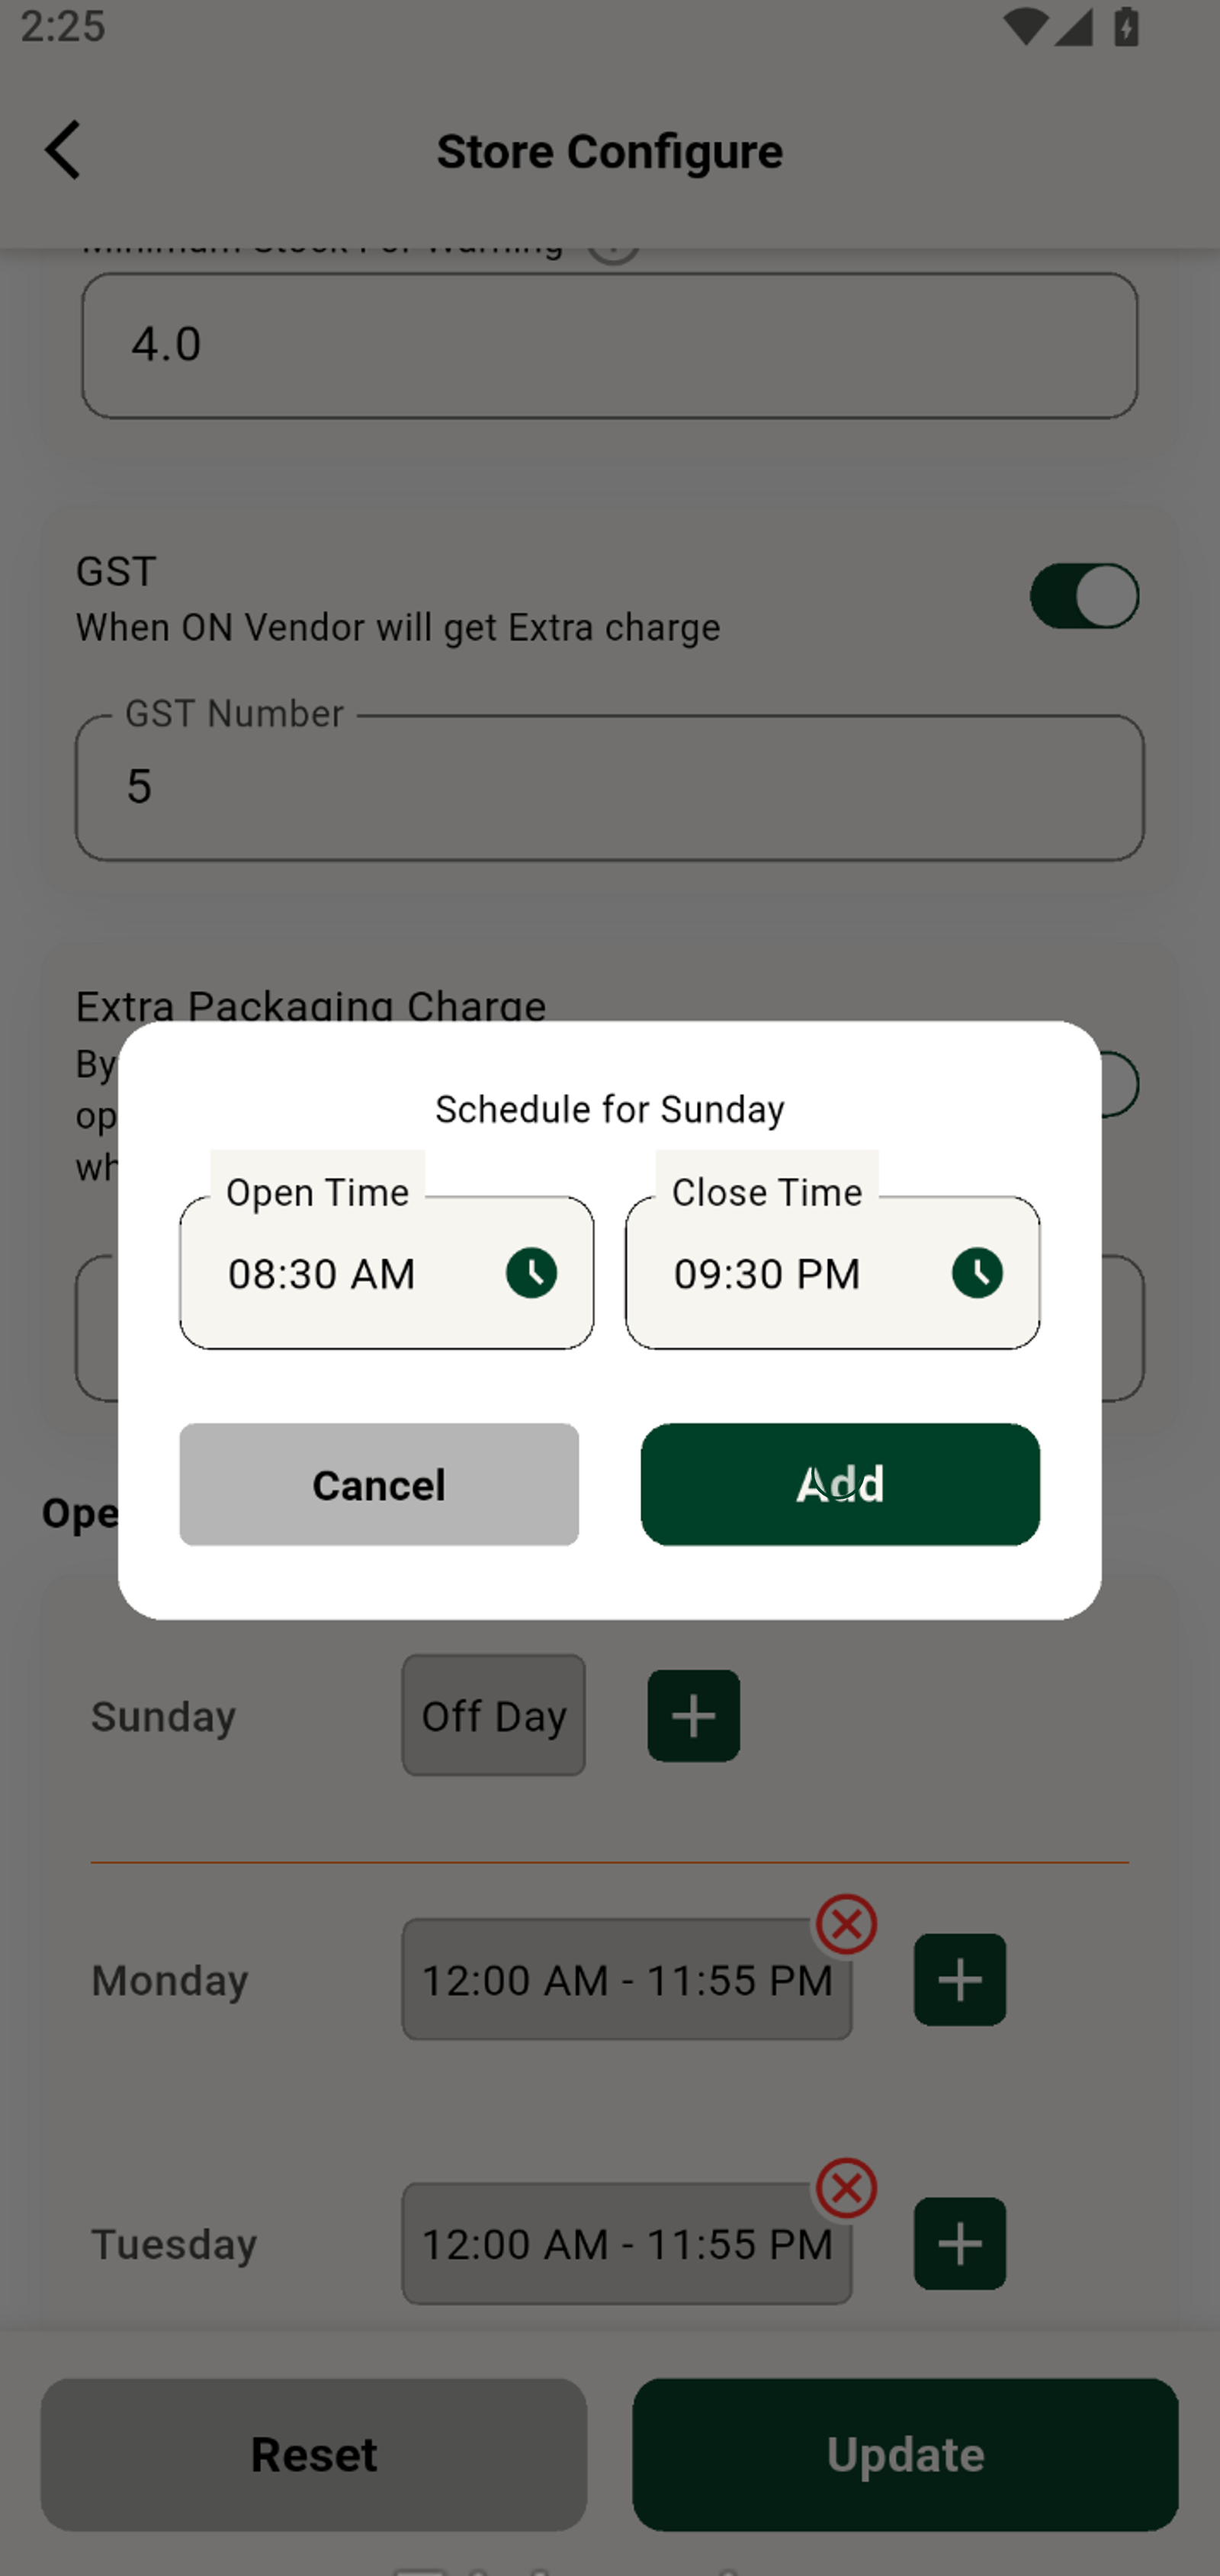
Add the new schedule to ensure your hours update for customers.
22. Contact support if you encounter issues updating store settings.
Hit Update to save your new hours and availability settings instantly.